Are you remembering the days when your truck was riding a little smoother? Does it
- roll a little more on turns
- bottom out on bumps
- Dive when braking
- Squat when accelerating
- Bounce or slide sideways on a winding or rough road
I was seeing some of these symptom on my 2000 Ford F-150 and decided it was time to change the shocks. In addition to that there are about 75,000 miles on the odometer.
According the the Motorist Assurance Program (MAP) original stock shocks and struts probable should be replaced at 50,000. Need more help understanding the function of your shocks? There are some links at the end of the article to help you.
I purchased some Rancho RS5000 shocks, RS5236 for the rears and RS5235 for the front. No matter what brand of shocks you’re purchasing, always use their website to find out what to purchase.
[fusion_builder_container hundred_percent=”yes” overflow=”visible”][fusion_builder_row][fusion_builder_column type=”1_1″ background_position=”left top” background_color=”” border_size=”” border_color=”” border_style=”solid” spacing=”yes” background_image=”” background_repeat=”no-repeat” padding=”” margin_top=”0px” margin_bottom=”0px” class=”” id=”” animation_type=”” animation_speed=”0.3″ animation_direction=”left” hide_on_mobile=”no” center_content=”no” min_height=”none”]
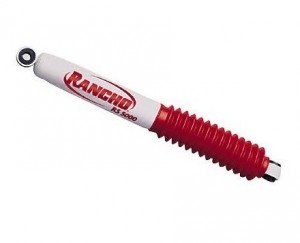
Ranch RS5000 Shock
Front Shock Replacement
Safety
Time for a bit of safety. By the way this doesn’t apply to people that think a car falling on them won’t hurt. Just make sure you get some video so you can be famous 🙂
Get yourself some jacks stands and use them! Don’t just count on that jack to hold the vehicle up. It takes an extra minute to set jack stands up. If you’re like me and working on a truck and Jeep, then purchasing jack stands made for SUVs and trucks makes sense.
[/fusion_builder_column][fusion_builder_column type=”1_1″ background_position=”left top” background_color=”” border_size=”” border_color=”” border_style=”solid” spacing=”yes” background_image=”” background_repeat=”no-repeat” padding=”” margin_top=”0px” margin_bottom=”0px” class=”” id=”” animation_type=”” animation_speed=”0.3″ animation_direction=”left” hide_on_mobile=”no” center_content=”no” min_height=”none”]

Jack Stands For Suvs And Trucks
When using jack stands put them on the frame of the vehicle. You don’t see the second set of jack stands yet, but I use two. Better to be paranoid.
[/fusion_builder_column][fusion_builder_column type=”1_1″ background_position=”left top” background_color=”” border_size=”” border_color=”” border_style=”solid” spacing=”yes” background_image=”” background_repeat=”no-repeat” padding=”” margin_top=”0px” margin_bottom=”0px” class=”” id=”” animation_type=”” animation_speed=”0.3″ animation_direction=”left” hide_on_mobile=”no” center_content=”no” min_height=”none”]

Jack Stands In Place
Old Shock Removal
Jack and remove the tire from one side of the front of the vehicle.
[/fusion_builder_column][fusion_builder_column type=”1_1″ background_position=”left top” background_color=”” border_size=”” border_color=”” border_style=”solid” spacing=”yes” background_image=”” background_repeat=”no-repeat” padding=”” margin_top=”0px” margin_bottom=”0px” class=”” id=”” animation_type=”” animation_speed=”0.3″ animation_direction=”left” hide_on_mobile=”no” center_content=”no” min_height=”none”]

Old Shock Exposed
The shock is held in place in the front by two bolts on the lower control arm.
[/fusion_builder_column][fusion_builder_column type=”1_1″ background_position=”left top” background_color=”” border_size=”” border_color=”” border_style=”solid” spacing=”yes” background_image=”” background_repeat=”no-repeat” padding=”” margin_top=”0px” margin_bottom=”0px” class=”” id=”” animation_type=”” animation_speed=”0.3″ animation_direction=”left” hide_on_mobile=”no” center_content=”no” min_height=”none”]

Lower Bracket Holding Old Shock
As well as one bolt on top.
[/fusion_builder_column][fusion_builder_column type=”1_1″ background_position=”left top” background_color=”” border_size=”” border_color=”” border_style=”solid” spacing=”yes” background_image=”” background_repeat=”no-repeat” padding=”” margin_top=”0px” margin_bottom=”0px” class=”” id=”” animation_type=”” animation_speed=”0.3″ animation_direction=”left” hide_on_mobile=”no” center_content=”no” min_height=”none”]

Top Bolt For Old Shock
On the upper bolt of the old shock is a plastic tube guide that can be removed by pulling up on it. I ended up using a flat head screwdriver to pry it up.
[/fusion_builder_column][fusion_builder_column type=”1_1″ background_position=”left top” background_color=”” border_size=”” border_color=”” border_style=”solid” spacing=”yes” background_image=”” background_repeat=”no-repeat” padding=”” margin_top=”0px” margin_bottom=”0px” class=”” id=”” animation_type=”” animation_speed=”0.3″ animation_direction=”left” hide_on_mobile=”no” center_content=”no” min_height=”none”]

Removing Clip From Upper Shock Bolt
To make things a little easy, spray some WD-40 or some other lubricant on all of the bolts and nuts.
[/fusion_builder_column][fusion_builder_column type=”1_1″ background_position=”left top” background_color=”” border_size=”” border_color=”” border_style=”solid” spacing=”yes” background_image=”” background_repeat=”no-repeat” padding=”” margin_top=”0px” margin_bottom=”0px” class=”” id=”” animation_type=”” animation_speed=”0.3″ animation_direction=”left” hide_on_mobile=”no” center_content=”no” min_height=”none”]

Lubricating Old Shock Nuts
There are two sets of nuts, one on top and one below near the spring. Put a wrench on the nut near the spring to keep it in place while you remove the top one.
[/fusion_builder_column][fusion_builder_column type=”1_1″ background_position=”left top” background_color=”” border_size=”” border_color=”” border_style=”solid” spacing=”yes” background_image=”” background_repeat=”no-repeat” padding=”” margin_top=”0px” margin_bottom=”0px” class=”” id=”” animation_type=”” animation_speed=”0.3″ animation_direction=”left” hide_on_mobile=”no” center_content=”no” min_height=”none”]

Removing Top Nut First
Remove the two nuts holding the lower section of the shock in place.
[/fusion_builder_column][fusion_builder_column type=”1_1″ background_position=”left top” background_color=”” border_size=”” border_color=”” border_style=”solid” spacing=”yes” background_image=”” background_repeat=”no-repeat” padding=”” margin_top=”0px” margin_bottom=”0px” class=”” id=”” animation_type=”” animation_speed=”0.3″ animation_direction=”left” hide_on_mobile=”no” center_content=”no” min_height=”none”]

Removing Lower Nuts From Old Shock
The shock should drop down through the bottom if you’re lucky.
I was lucky with one shock. The other one expanded 100% once the bottom bolts were take off. I had a good time compressing the shock and trying to yank it through the bottom before it expanded again. It was an easy 10 minutes of cursing getting the old one out.
Tip: Need a little more room? Use the jack to slowly raise the control arm up some.
New Shock Installation
The new shock boot slips on and is zip tied in place.
Tip: Make sure all the rubber bushings are the correct ones when your shocks come. They will probably look like small tires. I waited about 6 months after purchasing to check mine. The wrong rubber bushing was shipped with one of my shocks.
[/fusion_builder_column][fusion_builder_column type=”1_1″ background_position=”left top” background_color=”” border_size=”” border_color=”” border_style=”solid” spacing=”yes” background_image=”” background_repeat=”no-repeat” padding=”” margin_top=”0px” margin_bottom=”0px” class=”” id=”” animation_type=”” animation_speed=”0.3″ animation_direction=”left” hide_on_mobile=”no” center_content=”no” min_height=”none”]

Install Replacement Shock Boot
Slip the new shock through the bottom of the lower control arm.
Tighten the nuts on the lower half of the shock first.
[/fusion_builder_column][fusion_builder_column type=”1_1″ background_position=”left top” background_color=”” border_size=”” border_color=”” border_style=”solid” spacing=”yes” background_image=”” background_repeat=”no-repeat” padding=”” margin_top=”0px” margin_bottom=”0px” class=”” id=”” animation_type=”” animation_speed=”0.3″ animation_direction=”left” hide_on_mobile=”no” center_content=”no” min_height=”none”]

Tightening Lower Nuts
Using a wrench to hold the second lower nut in place, tighten the nut on the top of the shock. This will compress the rubber bushing that is on the top and underneath the shock tower.
[/fusion_builder_column][fusion_builder_column type=”1_1″ background_position=”left top” background_color=”” border_size=”” border_color=”” border_style=”solid” spacing=”yes” background_image=”” background_repeat=”no-repeat” padding=”” margin_top=”0px” margin_bottom=”0px” class=”” id=”” animation_type=”” animation_speed=”0.3″ animation_direction=”left” hide_on_mobile=”no” center_content=”no” min_height=”none”]

Tightening Upper Nut On New Shock
Go back over all the nuts and make sure they are tight.
Put the wheel back on the front and lower the vehicle.
Rear Shock Replacement
Old Shock Removal
Jack stands were used to support the frame and the one side of the rear axle that’s being worked on.
[/fusion_builder_column][fusion_builder_column type=”1_1″ background_position=”left top” background_color=”” border_size=”” border_color=”” border_style=”solid” spacing=”yes” background_image=”” background_repeat=”no-repeat” padding=”” margin_top=”0px” margin_bottom=”0px” class=”” id=”” animation_type=”” animation_speed=”0.3″ animation_direction=”left” hide_on_mobile=”no” center_content=”no” min_height=”none”]

Supporting Frame And Axle
Supporting Frame and Axle
Lubricate all the bolts you are going to remove.
Similar to removing the front shock, start by removing the bolt on top of the rear shock.
Note: There is no room to maneuver your hands in this tight spot. It would make it easier if you have a deep socket and stubby ratchet. At least you wouldn’t be like me only moving the wrench 2 inches at a time 🙁
 Removing Old Shock Upper Nut
Not So Deep Socket Tip: I didn’t have a deep socket for my ratchet, but after wrenching the nut a little I popped the socket a little from the ratchet and was able to rig a not so deep socket.
 Ratcheting Nut the Rest of the Way
If your lucky enough you’ll have an impact wrench to remove the lower bolts. If not then make sure to use the longest wrenches you have to give you the most mechanical advantage.
 Removing Lower Bolt from Old Shock
New Shock Installation
The dust boot goes on just like the front one and is secured with a zip tie.
When the rear shock goes in there will be a rubber bushing will go on top of the bracket and one will sit below.
 New Shock Rubber Bushing Orientation
Start by putting the top part of the rear shock in place and putting the bolt in the lower bracket just to hold it in place. Don’t forget to put the rubber bushing on that sits below the upper bracket.
Tighten the top nut first. If you’re like me you’ll hand tighten it first, then finish off tightening it with an open ended or crescent wrench.
Note: I found that a wrench under the upper mounting bracket wasn’t necessary.
 Hand Tightening New Shock Upper Nut
If you’re wondering how much you need to compress the rubber bushing, look at the old one that you just took off for reference.
 Tightening Upper Nut[/fusion_builder_column][/fusion_builder_row][/fusion_builder_container]
I did the same job on my F150 about 5 years ago.
Some other suggestions: Use spray on Liquid Wrench or PB Blaster to all the nuts that have to be loosened, these are more specific on loosened up corroded connections than WD-40 is. If you are able to, crawl under & spray the nuts you have to get to one or more times some days before you have to actually do the job. You may not have to jack up the truck to do the pre-spraying.
An angle grinder with a metal cutting wheel is sometimes very helpful in removing badly corroded nuts & bolts, since you will be discarding the old shocks. I consider it an essential tool for the home mechanic – it’s that useful.
Another tool I’ve recently acquired is proving it’s worth – a stubby ratchet wrench with flex handle, both 1/4″ and 3/8″ size. See HarborFreight.com http://www.harborfreight.com/3-piece-flex-head-stubby-ratchets-46742.html
You will be saving so much money by doing this kind of repair, invest some of it in tools that specifically make your job easier.
Finally, if you intend on keeping your truck indefinitely, use an antiseize compound on the threads of your new shocks before installing them. This will make it so much easier to remove them many miles down the road. The brand I use is called “Permatex Anti-seize lubricant.” This is an essential item for the home mechanic, especially in areas where salt is used on the roads.
Those are some great tips! Thank you.
I see you say you have a 2000 which is 10th generation 97-03 and 04… but you have springs and i have torsion bars… i dont know if yours is 2 wheel drive or what but mine is a 98 xl 4×4 and this is all different. help me understand