Before we can get to installing the corrugated steel siding on the shed, we need to make sure what we’re installing it on is flat and that J channel and drip flashing is installed. This article is meant to be complimentary to the video below.
Leveling Furring Strips on Exterior Walls
The furring strips are the base we’ll install the siding on later. If we don’t level them out, there’s a good chance we’ll get some waves in the final look of the siding.
Starting around the Windows
I used the area around the windows as a reference point because I didn’t want to look down the wall and see a bowed-out area around the windows when the corrugated steel is installed.
Some of the furring strips above the window were touching the shiplap so they had to be trimmed.

Installing Reference String to Level the Wall
Mark off increments where you will attach string along the wall as a guide. I marked every 2 feet starting from the bottom.

Install nails and run the string across the side of the building.


Leveling the Furring Strips
I ended up using door and window shims to level the furring strips. They’re inexpensive when you buy the contractor pack.

Leveling Without Reference String
There were some areas, specifically around the front door and windows, that using leveling string wouldn’t work. With these I used the largest level I had to span reference areas, like the corners and wood around the door.

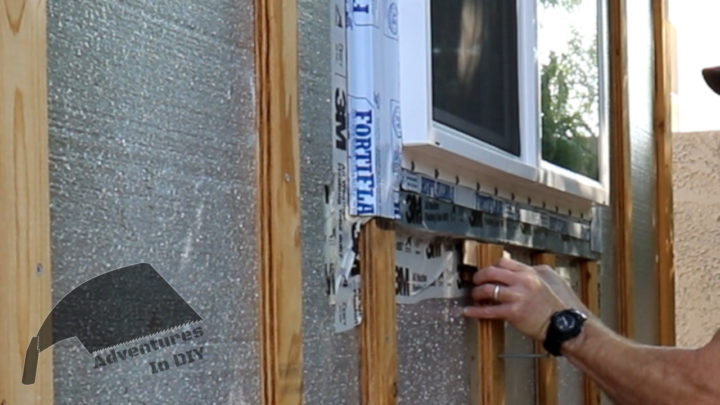
Installing J Channel Around the Windows and Door
There were two videos that really helped me with the installation of the J channel around the windows and door. The first one gives you quick fundamentals and the second one goes into a lot of details.
Tips:
- Do a test fit before you cut your corners.
- Take your time and watch how you cut the angles on the corner. Don’t cut that 45 degree in the wrong direction.
- Make sure to slide the corners so the metal overlaps with the other piece for a tight connection and professional look
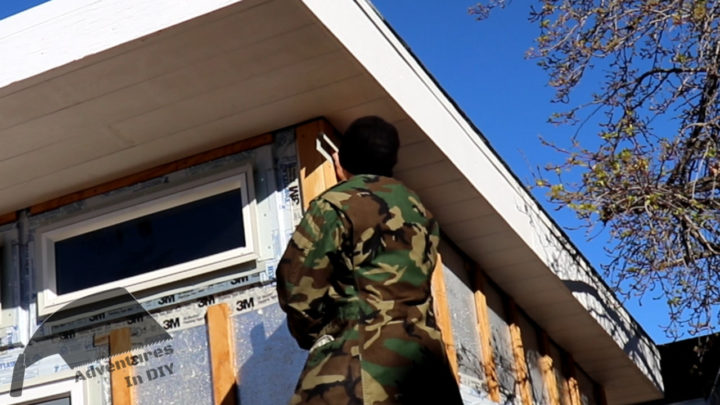
Installing J Channel Where the Wall Meets the Soffit
From what I’ve seen online, you would normally cover the J Channel with an outside corner piece, but I’m going to use it like in the pictures below.
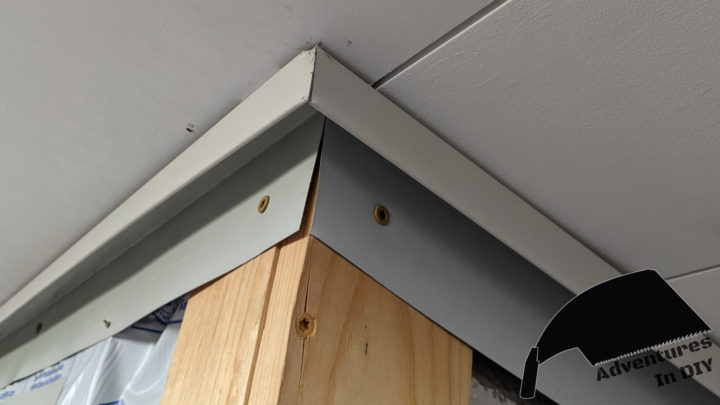

I had a hard time trying to find a resource on installing the J channel where the walls meet the soffit. Despite that, I figured there were a couple of things to think of.
- The chances of driving rain getting in where the J channel meets the soffit are pretty slim to none.
- You have to account for the angle of the side and not the front and back.
- Using an overlapping technique on the corner is going to be easier than doing a 45 degree angle with the slope of the side.
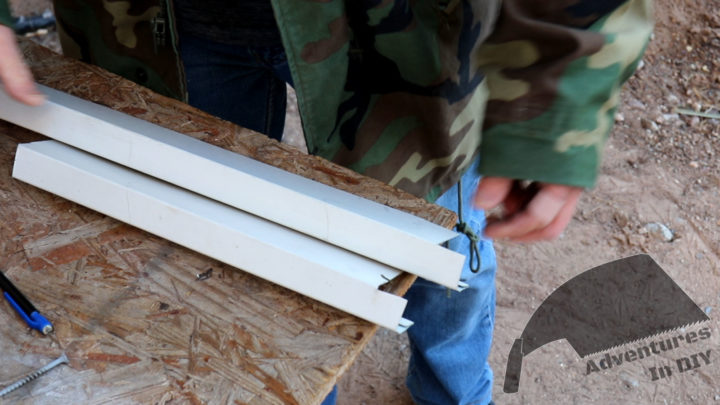
You can use a piece of scrap J channel and scribe a line or an adjustable angle guide to get the angle you’ll cut on the J channel.
I ended up getting the angle close enough and got creative with some bending to make it look right, at least from a distance.


Nails didn’t work well on the furring strips. I ended up using 1 ¼” exterior screws to attach both the J Channel and bottom drip edge.

Installing Drip Edge Base Trim for Corrugated Steel
This really isn’t necessary because the corrugated steel would hang inches from the gravel allowing any water to freely flow down without coming back onto the building. But hey, we’ve gone overboard in previous phases, why stop now?
Stapling Up the Bug Screen
If you just staple the screen up, there will be a gap between the drip edge and the screen. Fold the screen so it forms a flat surface on the bottom.

Drip Edge Install
When you do the install, it’s important to make sure the drip edge is level. Even though you won’t have the siding sit on the bottom of the drip edge, a level drip edge not only looks good but will give you a good reference for the siding install.
The following video helped me with details (around the 2 minute mark) of an outside corner drip edge install.
I spray painted the drip edge that would be seen after the install before installing it.
Install the drip edge 3/8 to ½ inch below the bottom of the shed wall.
Just like the J Channel install, I predrilled the drip edge and installed it with exterior grade screws. Using nails would be possible if the installation was on a different substrate like OSB or plywood. The furring strips over rigid foam had issues with providing enough resistance to easily drive nails in.

Make sure you overlap your drip edge if you have to use multiple pieces.

This part of the project was fairly inexpensive compared to others. I lucked out and was able to get my J channel on clearance.

Now that we have the J channel up and drip edge in place, we can move on to the siding prep and install. If you want content like this sent to your inbox when it’s available, please subscribe using the subscribe now area at the top right.
I can’t thank you enough for doing the modern shed series. Your videos inspired me during Covid lockdown and I’ve nearly finished my own shed – just wrapping up minor details.
I’m still amazed at your patience to do the work and film the entire process in such great detail – not sure if I would have ever built this without seeing your videos.
Thanks so much and look forward to seeing more content in the future
Thank you for your wonderful series on building a modern work shop. Are you planning to finish the series, or is part 14 the final part? BTW, I’m a retired general contractor. 40 years experience. I learned a lot from you!
I’m planning to build a very similar shed. LOL. I’m 79.