Do you need to modify your table saw power box or broken your switch? When I installed a new table saw fence, the old table saw power box and switch were too big to fit. Also, I broke the tabs for the original power switch. That’s OK because it just gave me an excuse to put a cooler one in, a Rocket Launcher style switch!
[fusion_builder_container hundred_percent=”yes” overflow=”visible”][fusion_builder_row][fusion_builder_column type=”1_1″ background_position=”left top” background_color=”” border_size=”” border_color=”” border_style=”solid” spacing=”yes” background_image=”” background_repeat=”no-repeat” padding=”” margin_top=”0px” margin_bottom=”0px” class=”” id=”” animation_type=”” animation_speed=”0.3″ animation_direction=”left” hide_on_mobile=”no” center_content=”no” min_height=”none”]
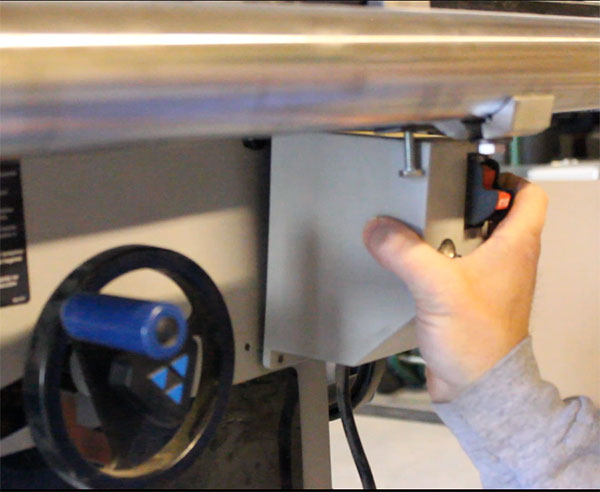
Original Table Saw Switch Is Too Deep
The video and article demonstrates the solution used to put in a not so deep box and new power switch.
Replacement Box
The old box dimensions were 3 in. W x 4 in. H x 5.25 in. L. This means there was about 63 cubic inches in the box. The new box had to be not as deep but still have about the same volume to house all the electrical pieces.
I ordered a Serpac 173BK project box with the dimensions 4.88 in. W x 2.5 in. H x 6.88 in. L, yielding almost 84 cubic inches. There was plenty of room.
[/fusion_builder_column][fusion_builder_column type=”1_1″ background_position=”left top” background_color=”” border_size=”” border_color=”” border_style=”solid” spacing=”yes” background_image=”” background_repeat=”no-repeat” padding=”” margin_top=”0px” margin_bottom=”0px” class=”” id=”” animation_type=”” animation_speed=”0.3″ animation_direction=”left” hide_on_mobile=”no” center_content=”no” min_height=”none”]

Serpac 173 Black Project Replacement Power Box
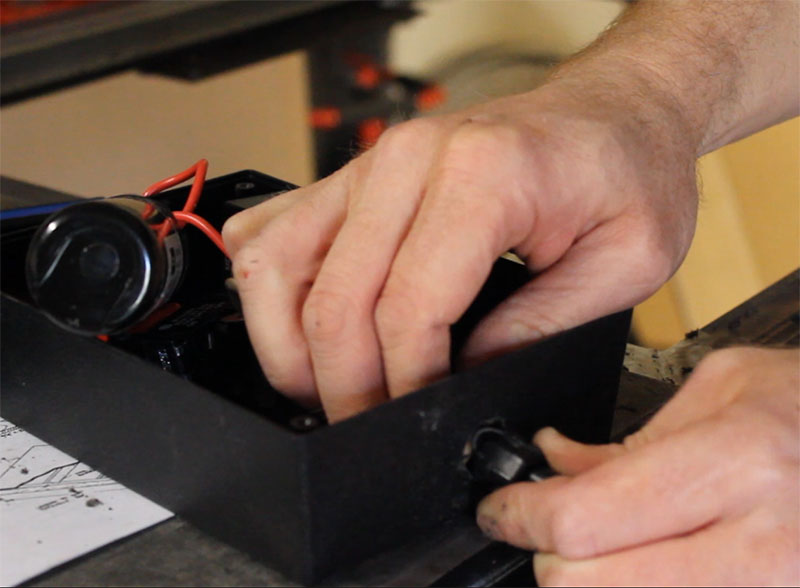
Taking Existing Power Box Apart
Before you start TAKE PICTURES! Always have some documentation how things are supposed to look when you’re done.
The Delta TS350 table saw switch housing contains:
- Power Switch with removable key
- Circuit Breaker Switch
- Starter Relay
- Capacitor
Disconnect as few of the wires as necessary to take the components out. It is useful to see how the wires feed off of things like the starter relay and capacitor.
[/fusion_builder_column][fusion_builder_column type=”1_1″ background_position=”left top” background_color=”” border_size=”” border_color=”” border_style=”solid” spacing=”yes” background_image=”” background_repeat=”no-repeat” padding=”” margin_top=”0px” margin_bottom=”0px” class=”” id=”” animation_type=”” animation_speed=”0.3″ animation_direction=”left” hide_on_mobile=”no” center_content=”no” min_height=”none”]
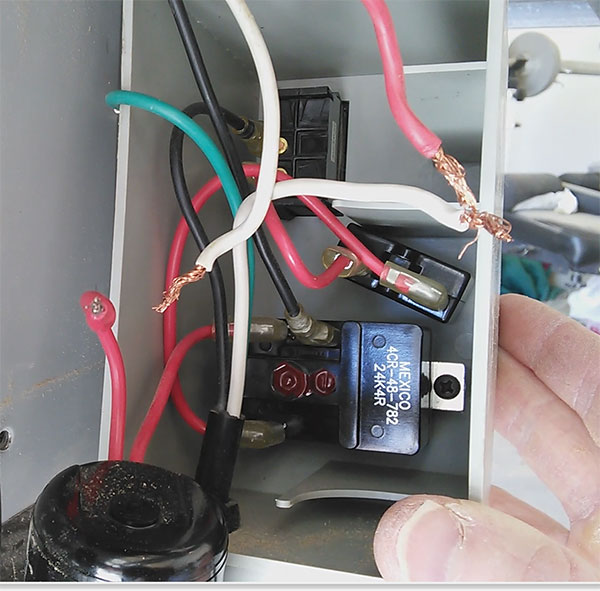
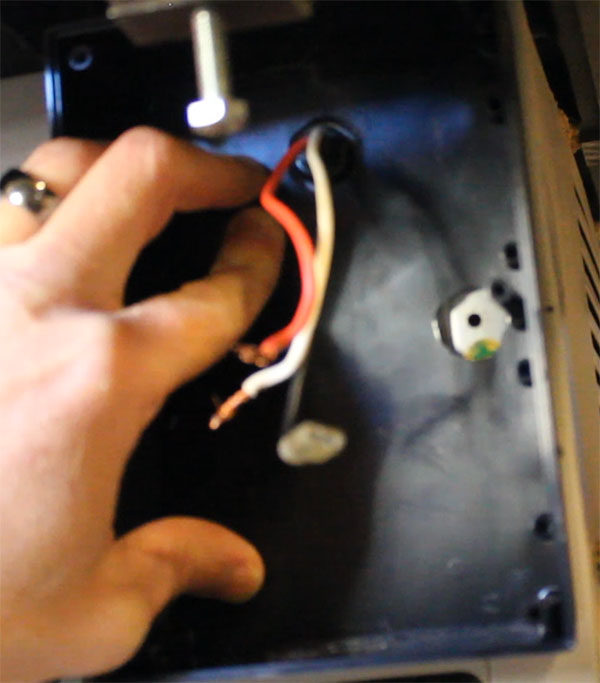
Table Saw Power Switch Wiring
Taking the switch out in one piece proved to be difficult. There are tabs on the top and bottom that need to be pushed in at the same time. I shattered the tabs on mine.
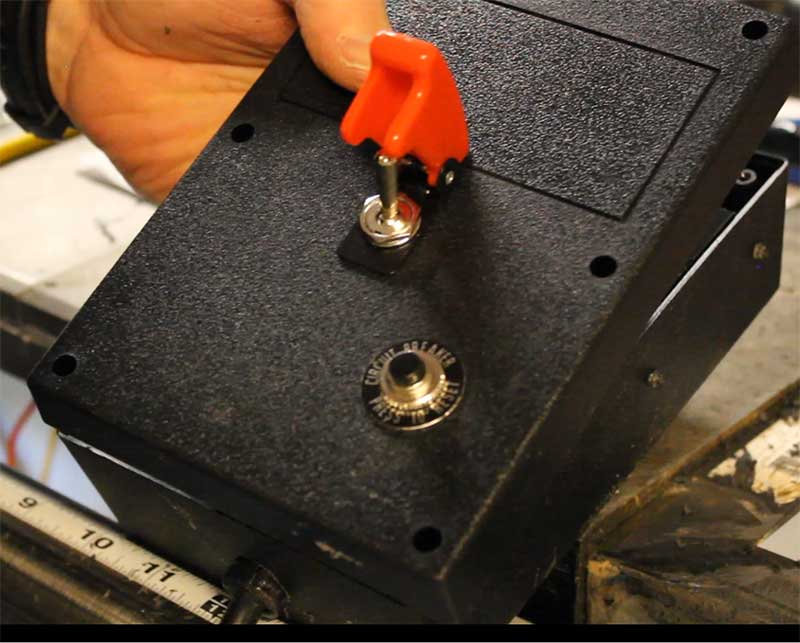
Rocket Launcher Style Toggle Switch
Lucky for me I had a rocket launcher style toggle switch that was rated similar to the original, SPST (Single Pole Single Throw or ON OFF) switch rated at 15A 125VAC and 10A 250VAC. If you want to replace the switch with something similar to the original, there is a cheaper alternative on Amazon than the $23 one you can buy from replacement parts sites.
[/fusion_builder_column][fusion_builder_column type=”1_1″ background_position=”left top” background_color=”” border_size=”” border_color=”” border_style=”solid” spacing=”yes” background_image=”” background_repeat=”no-repeat” padding=”” margin_top=”0px” margin_bottom=”0px” class=”” id=”” animation_type=”” animation_speed=”0.3″ animation_direction=”left” hide_on_mobile=”no” center_content=”no” min_height=”none”]

Replacement Table Saw Switch
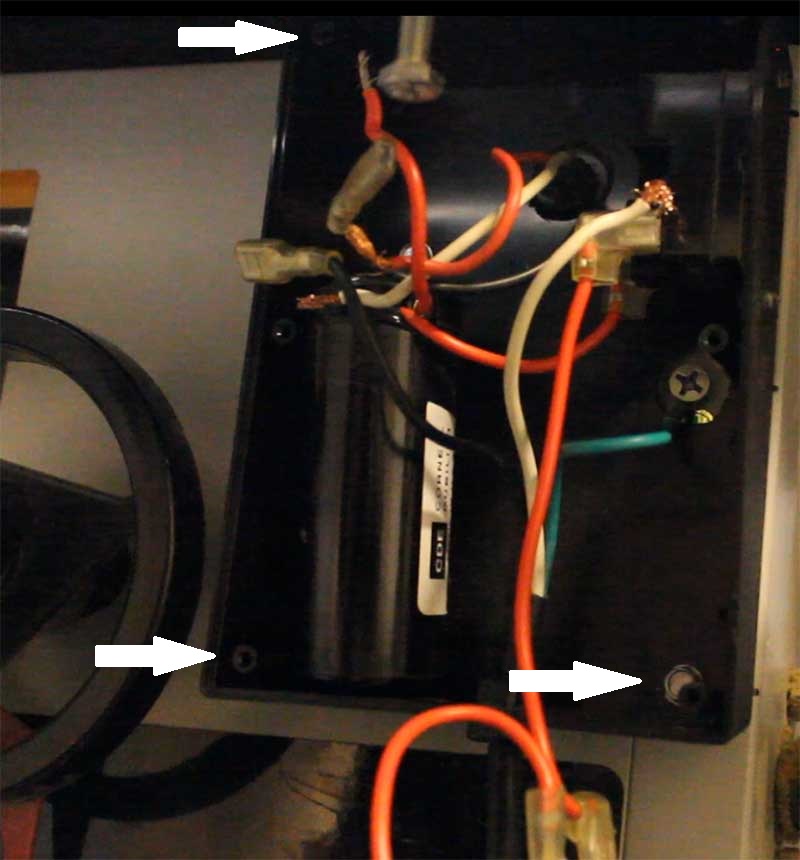
Marking and Drilling Holes for Wires and Ground
There are three holes that need to be drilled into the box for the
- Wires coming out of the table saw
- Power plug
- Ground connection on the table saw
A ¾ inch drill bit was used for the wires coming out of the table saw and access to the ground area.
[/fusion_builder_column][fusion_builder_column type=”1_1″ background_position=”left top” background_color=”” border_size=”” border_color=”” border_style=”solid” spacing=”yes” background_image=”” background_repeat=”no-repeat” padding=”” margin_top=”0px” margin_bottom=”0px” class=”” id=”” animation_type=”” animation_speed=”0.3″ animation_direction=”left” hide_on_mobile=”no” center_content=”no” min_height=”none”]
Power Box and Ground Holes In Replacement Box
Power Plug
The power plug is a fun one to install. There is a snap grommet clamp used to hold it in the original housing. It was easier to cut the power cord out of the original box.
[/fusion_builder_column][fusion_builder_column type=”1_1″ background_position=”left top” background_color=”” border_size=”” border_color=”” border_style=”solid” spacing=”yes” background_image=”” background_repeat=”no-repeat” padding=”” margin_top=”0px” margin_bottom=”0px” class=”” id=”” animation_type=”” animation_speed=”0.3″ animation_direction=”left” hide_on_mobile=”no” center_content=”no” min_height=”none”]
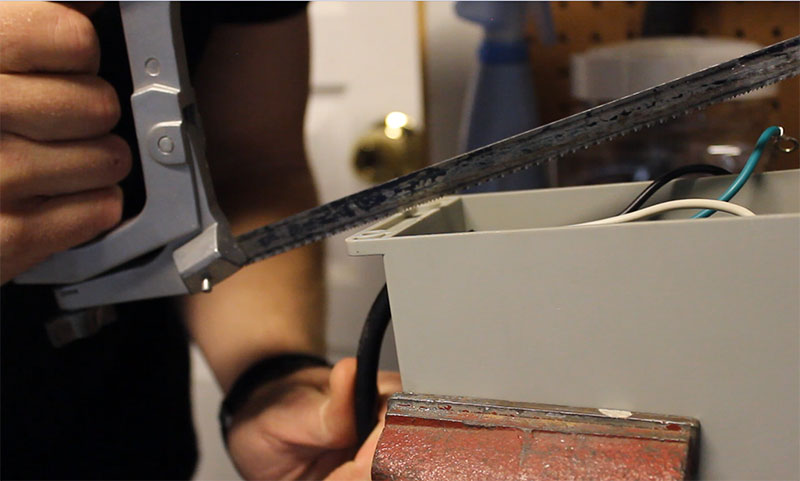
Cutting Out Power Cord With Hacksaw
You can then pull apart the clamp and reuse it in the new housing. Use a ½ inch drill bit on the new housing. You’ll have to use the drill bit to slightly bore out the hole till the power cord with the grommet clamp piece to fit.
[/fusion_builder_column][fusion_builder_column type=”1_1″ background_position=”left top” background_color=”” border_size=”” border_color=”” border_style=”solid” spacing=”yes” background_image=”” background_repeat=”no-repeat” padding=”” margin_top=”0px” margin_bottom=”0px” class=”” id=”” animation_type=”” animation_speed=”0.3″ animation_direction=”left” hide_on_mobile=”no” center_content=”no” min_height=”none”]
Putting Old Power Cord In New Box
Drilling and Mounting the Switches
Keep in mind when you’re deciding where to put the switches not to make the too high on the box. It will make them not as accessible.
On my box, the power switch ended up being â…” the way down from the top and the reset button was in a similar place as the original one.
[/fusion_builder_column][fusion_builder_column type=”1_1″ background_position=”left top” background_color=”” border_size=”” border_color=”” border_style=”solid” spacing=”yes” background_image=”” background_repeat=”no-repeat” padding=”” margin_top=”0px” margin_bottom=”0px” class=”” id=”” animation_type=”” animation_speed=”0.3″ animation_direction=”left” hide_on_mobile=”no” center_content=”no” min_height=”none”]
Final Switch Configuration
Attaching New Box to Table Saw
I just did a visual check using the right side of the table saw to put the box on straight.
The new box was attached using self tapping screws.
Getting to the top right area of the box was a problem so only 3 screws were used. An existing screw hole on the right side was reused.
[/fusion_builder_column][fusion_builder_column type=”1_1″ background_position=”left top” background_color=”” border_size=”” border_color=”” border_style=”solid” spacing=”yes” background_image=”” background_repeat=”no-repeat” padding=”” margin_top=”0px” margin_bottom=”0px” class=”” id=”” animation_type=”” animation_speed=”0.3″ animation_direction=”left” hide_on_mobile=”no” center_content=”no” min_height=”none”]
Power Box Install Points On Table Saw
Install the Ground
The old ground connection to the table saw body was free spinning when I took it out. When installing the new ground a slightly larger screw was used to make sure the ground connection was firmly seated on the table saw body.
[/fusion_builder_column][fusion_builder_column type=”1_1″ background_position=”left top” background_color=”” border_size=”” border_color=”” border_style=”solid” spacing=”yes” background_image=”” background_repeat=”no-repeat” padding=”” margin_top=”0px” margin_bottom=”0px” class=”” id=”” animation_type=”” animation_speed=”0.3″ animation_direction=”left” hide_on_mobile=”no” center_content=”no” min_height=”none”]
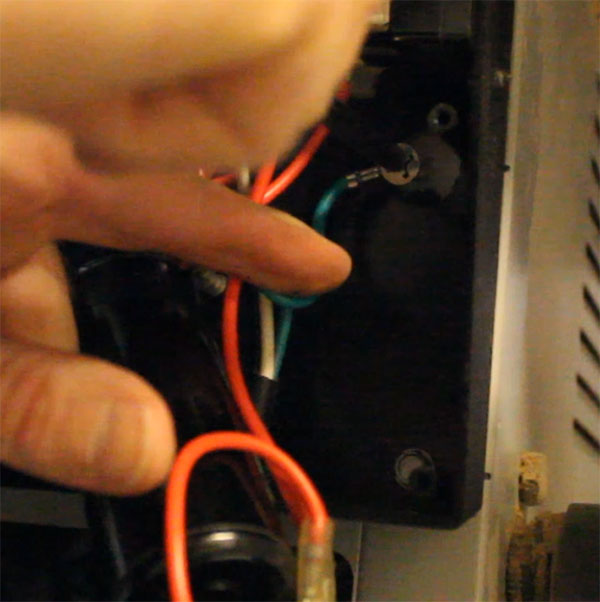
Table Saw Power Switch Ground Install
Putting it All Together and Testing
The top of the project box case is held on by four screws. After that it was just a matter of “arming” and doing a test “launch” of the table saw.
[/fusion_builder_column][fusion_builder_column type=”1_1″ background_position=”left top” background_color=”” border_size=”” border_color=”” border_style=”solid” spacing=”yes” background_image=”” background_repeat=”no-repeat” padding=”” margin_top=”0px” margin_bottom=”0px” class=”” id=”” animation_type=”” animation_speed=”0.3″ animation_direction=”left” hide_on_mobile=”no” center_content=”no” min_height=”none”]

New Power Box And New Switch Installed
If you found this article helpful, please share it and subscribe at the top of the page to get the latest articles sent to you.[/fusion_builder_column][/fusion_builder_row][/fusion_builder_container]
put switches on many of my tools. I buy a double metal outlet box from a hardware store and put in a light switch and a duplex outlet. That outlet will get used more than any other in the shop.