I’m not sure how you are, but I know I really want to organize my garage area. It kinda looks like an explosion of tools and projects happened and I make enough room for my wife to park her car in that explosion. I know what I want to organize now, but not really sure what I want to organize next.
The idea behind this project is to make it so you can add additional modules to your stack as you figure out what you need. The video below goes over the build process, and there is a sketchup file after the build notes.
Materials
For this project 1/2 inch plywood is used because it’s cheaper that 3/4 inch plywood, and when you stack two boxes together they will almost make a 1 inch separation. I feel that using ¾ inch plywood would make too much of a separation.
Small Parts Organizers:
- Stanley Sortmaster
- Home Depot HDX small parts organizer
Modular Section Dimensions
I’m building modular sections, otherwise known as boxes, for two different types of small item organizers. The larger one is a Stanley parts organizer and the other is a smaller HDX one from Home Depot.
Stanley Organizer Section
Cut List
- 2 pieces 18 7/8 x 13 1/4 x 1/2
- 2 pieces 13 1/4 x 3 3/4 x 1/2
- 1 piece 17 7/8 x 3 3/4 x 1/2 (Approximately. See below)
For the Stanley organizer module you’re going to need to cut two pieces 18 7/8 x 13 1/4 x 1/2 that will be used for the top and bottom.
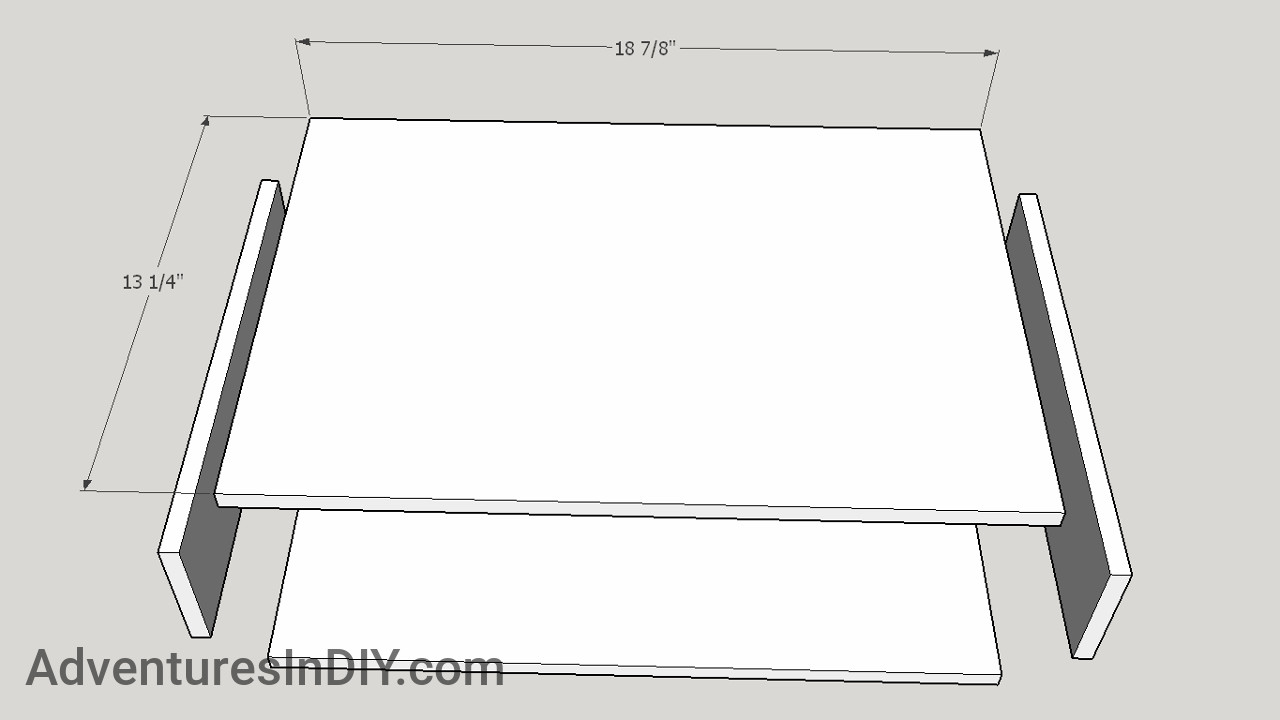
Stanley Storage Module Top and Bottom Measurements
You will need two side pieces are 13 1/4 x 3 3/4 x 1/2.
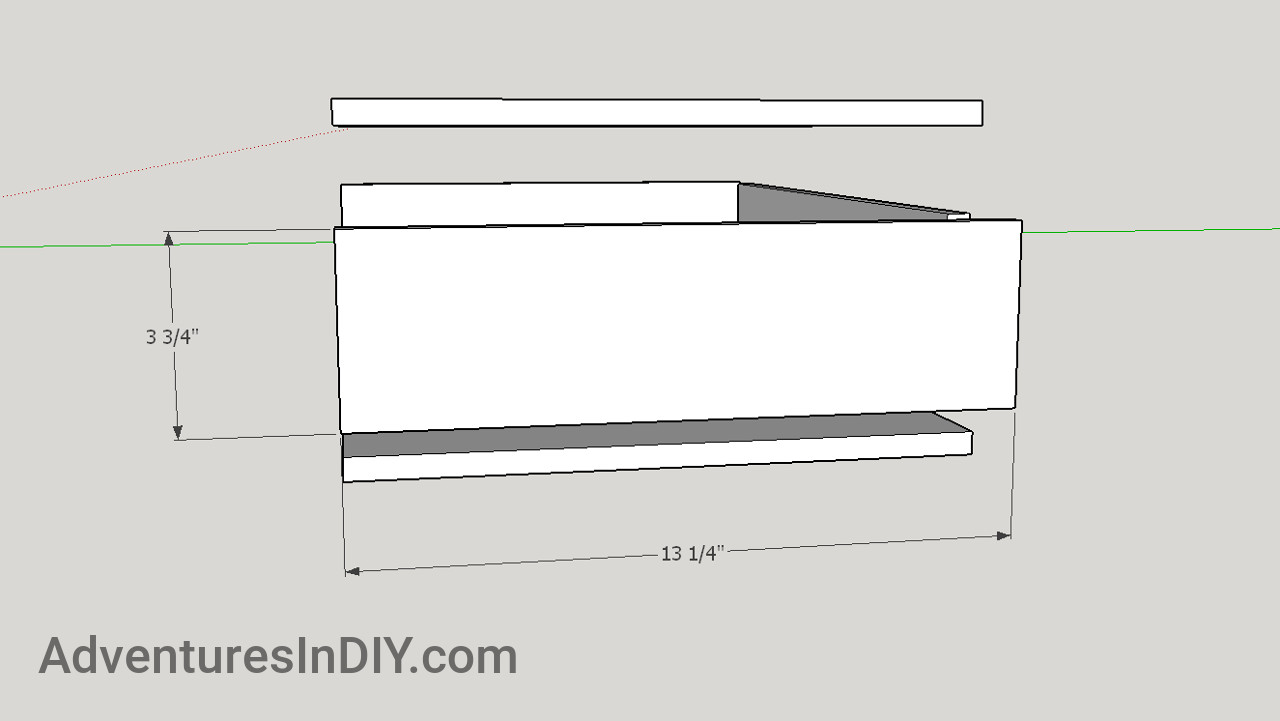
Stanley Storage Module Side Measurements
Lastly, you’ll need a back piece that is 17 7/8 x 3 3/4 x 1/2. That is, it will be slightly bigger than 17 7/8 inches because 1/2 inch plywood isn’t half an inch. It is a little bit thinner than that. The way I got around this measurement was to set the fence a little bit bigger than the measurements, make the cut, try the fit and reduce the fence position until the back fit snug. It’s kind of a pain but you can then use the fence position for the other Stanley boxes you make.
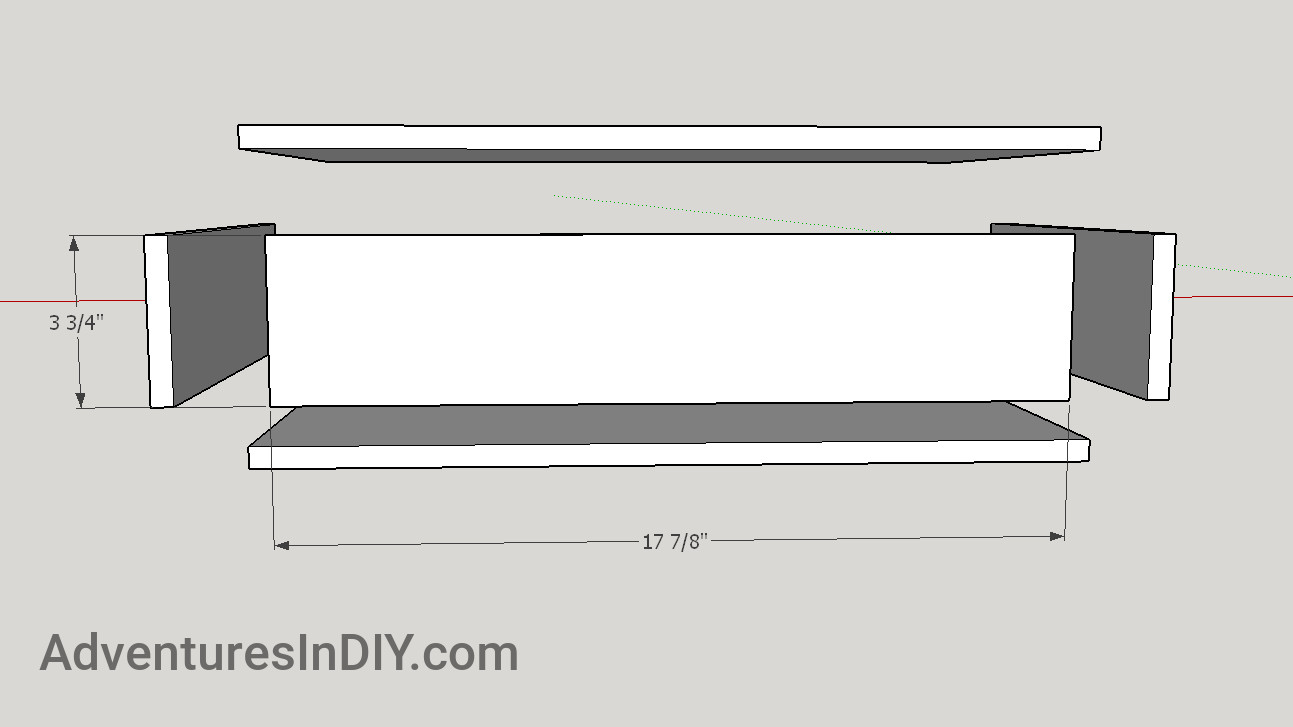
Stanley Storage Module Back Rough Measurements
HDX Organizational Section
Cut List
- 2 pieces 16 1/4 x 12 1/2 x 1/2
- 2 pieces 12 1/2 x 2 7/8 x 1/2
- 1 piece 15 1/4 x 2 7/8 x 1/2 (Approximately. See below)
The HDX organizers I’m using are the ones you could buy in 2 packs this last holiday season. Similar to the Stanley organizer module, you’ll cut all the pieces listed above. Also, fitting the back piece is the same as the Stanley one.
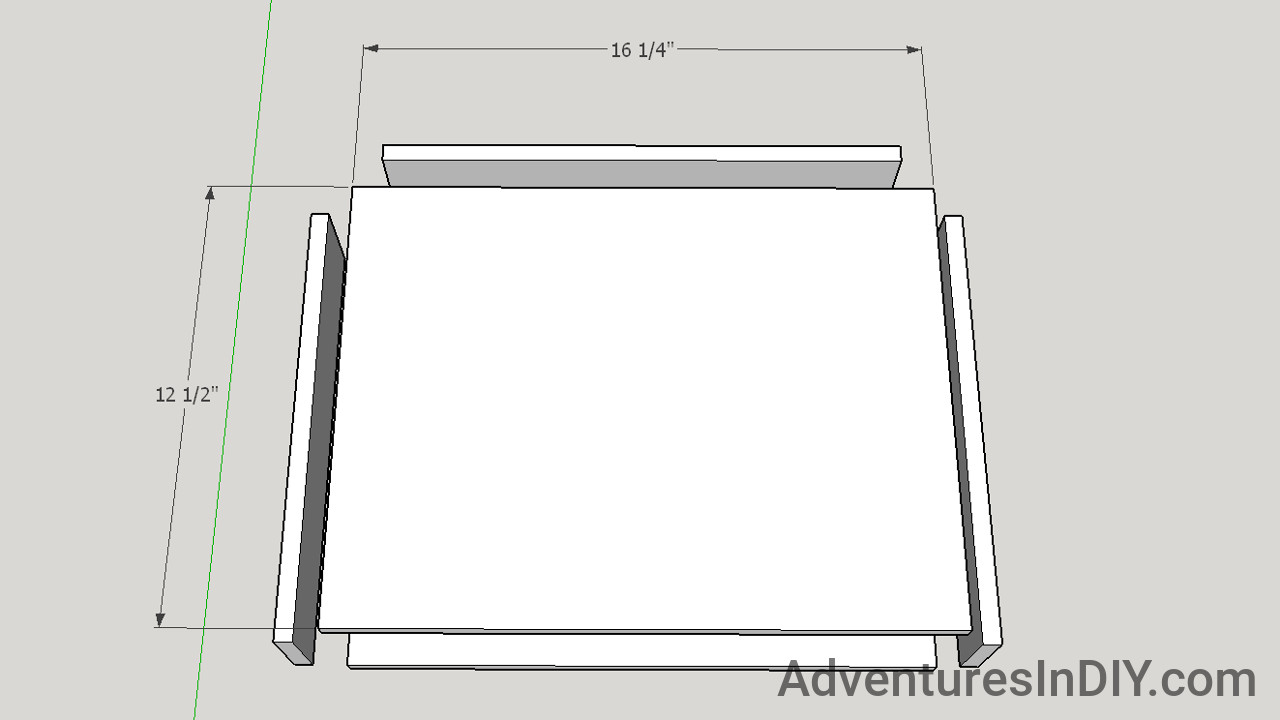
HDX Storage Module Top and Bottom Measurements
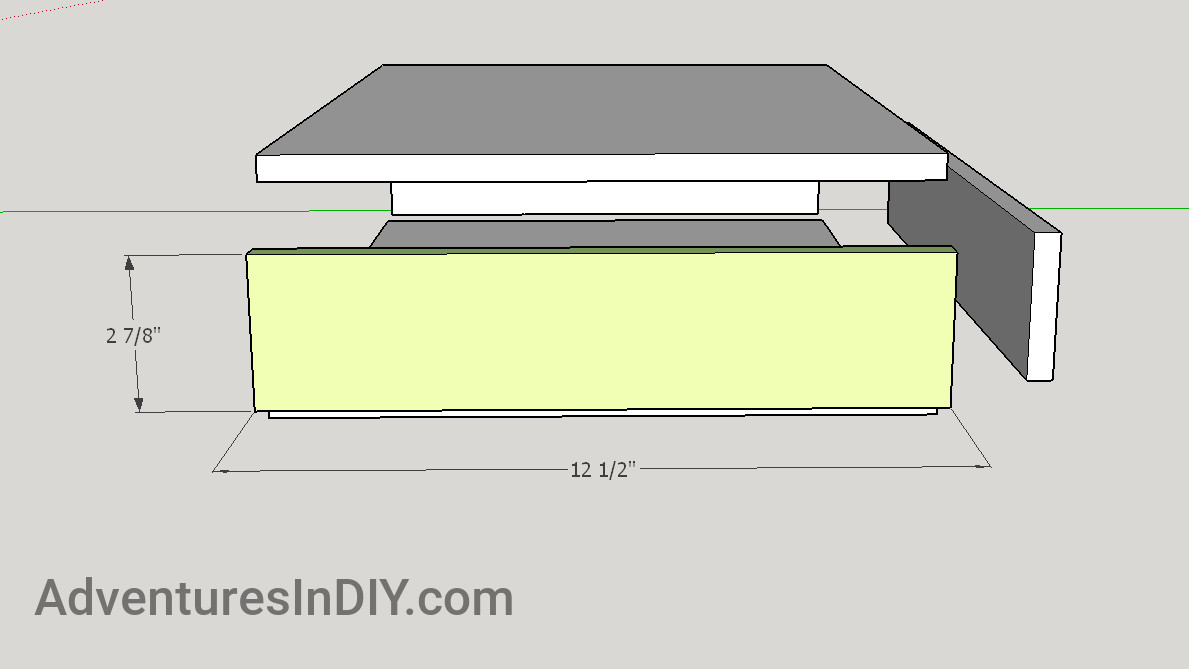
HDX Storage Module Side Measurements
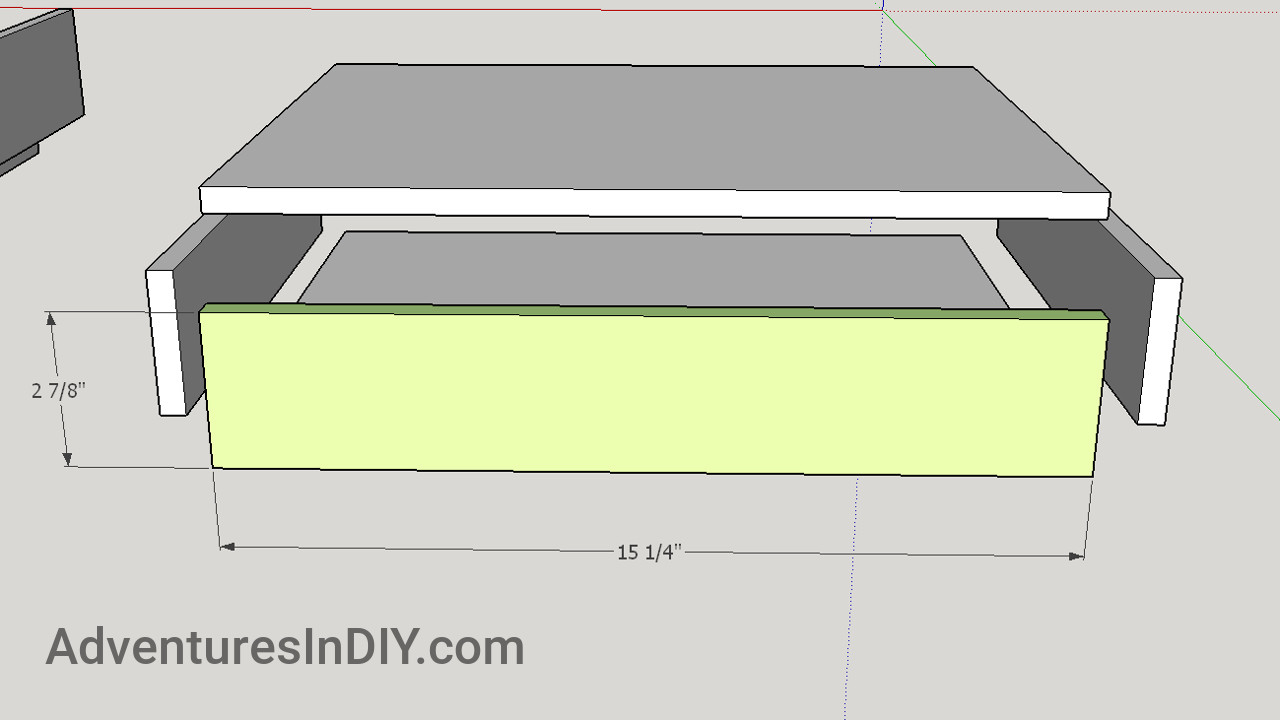
HDX Storage Module Rough Measurements For Back
Drilling Holes For Connecting Screws
One module is connected to the next one using screws. I went with this option because it was the cheapest. If you really want to get fancy, you could go with something like 1/4 inch T-Nuts and bolts to connect each section together. Just make sure you have a template with a consistent reference.
Drill and taper 4 holes for #12 3/4 inch wood screws. I eyeballed the distribution on the holes. Only thing to keep in mind is you’ll be using a ratcheting style screwdriver so don’t get too close to the sides or back.
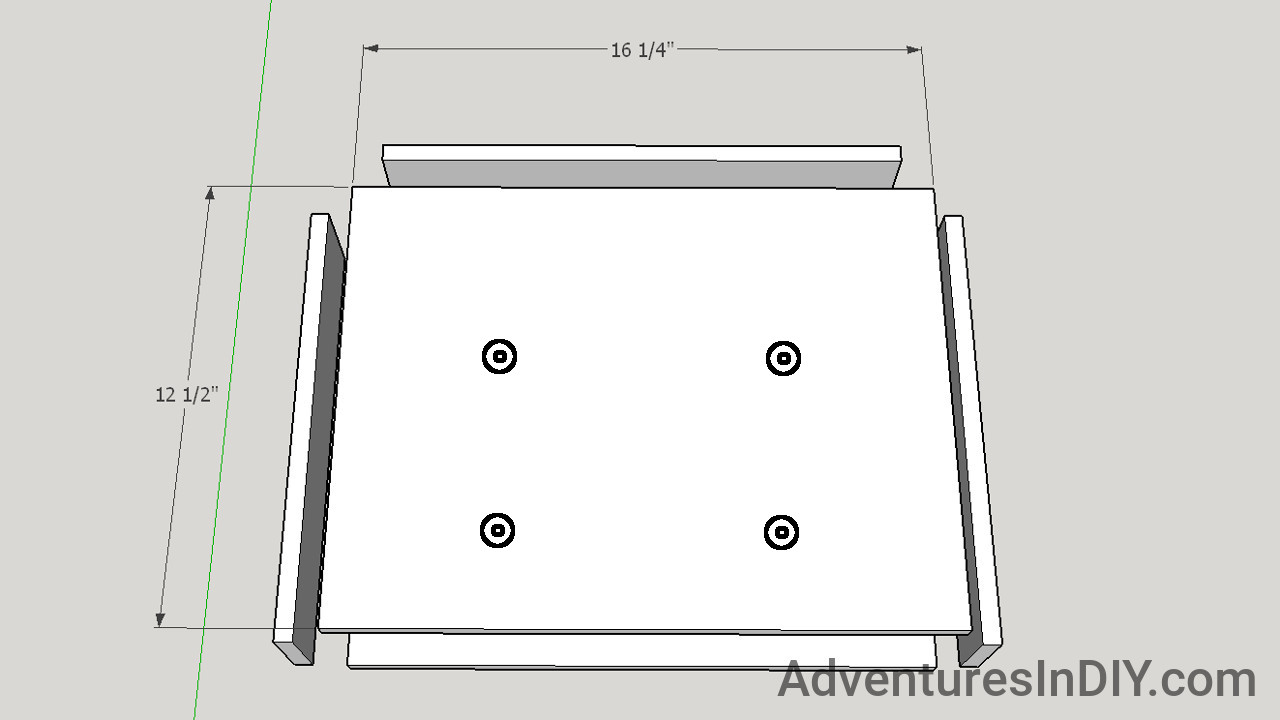
Bottom Hole Placement For All Modules
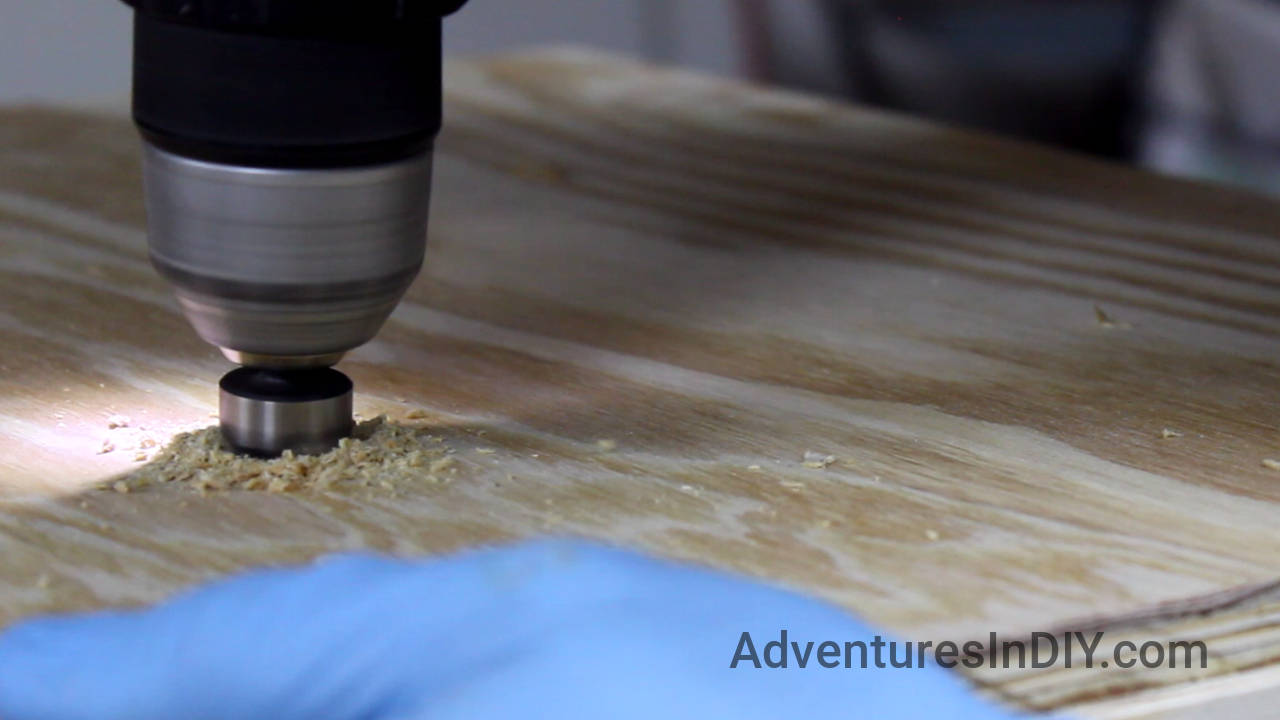
Tapering Screw Holes So Screw Heads Are Recessed
Drive in the screws so you can use them later to mark where you’re going to drill pilot holes in the top of the joining module.
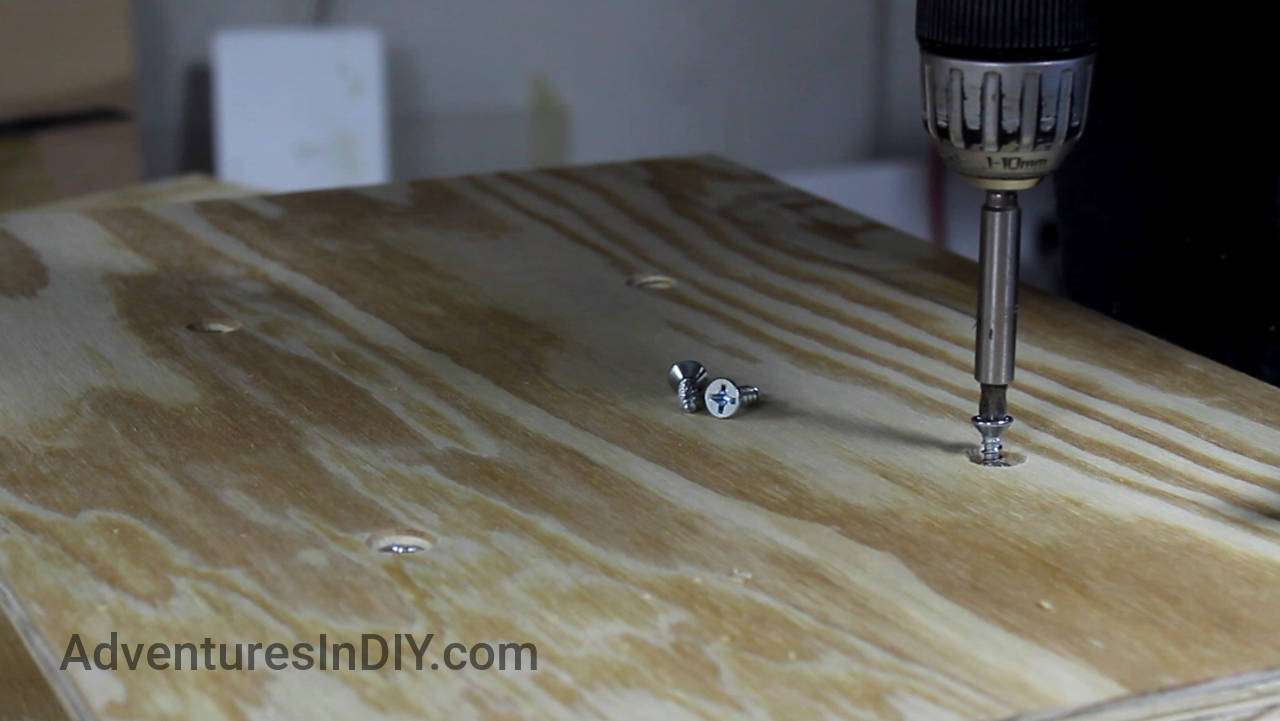
Driving Screws In Bottom Before Assembly
Assembling the Modular Sections
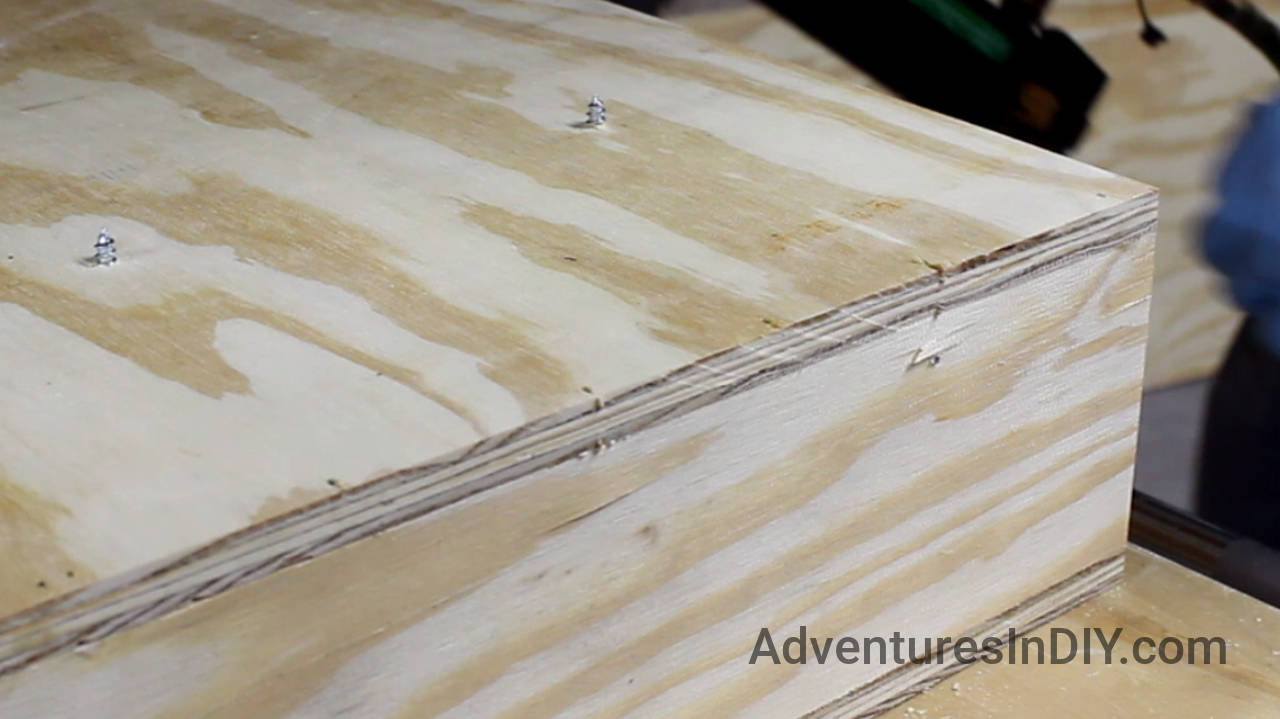
The box carcass is glued and brad nailed together. Just make sure you keep your fingers away from where the brad nail is going. Sometimes they go in crooked.
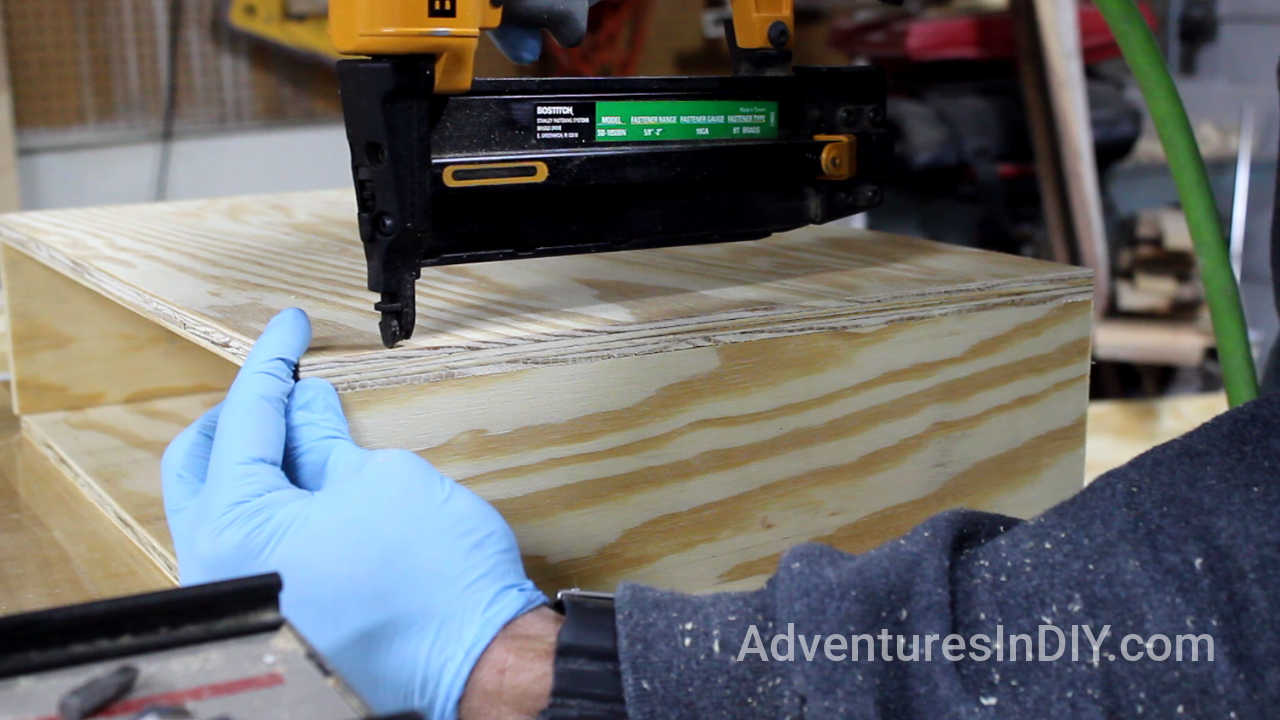
Assembling the Storage Modules
Keep Your Hands Safe When Brad Nailing
As described in the cut list sections, this is where you’re going to make incremental cuts to the back piece till it fits length wise. Once you figure the final measurement out, cutting the rest is easy.
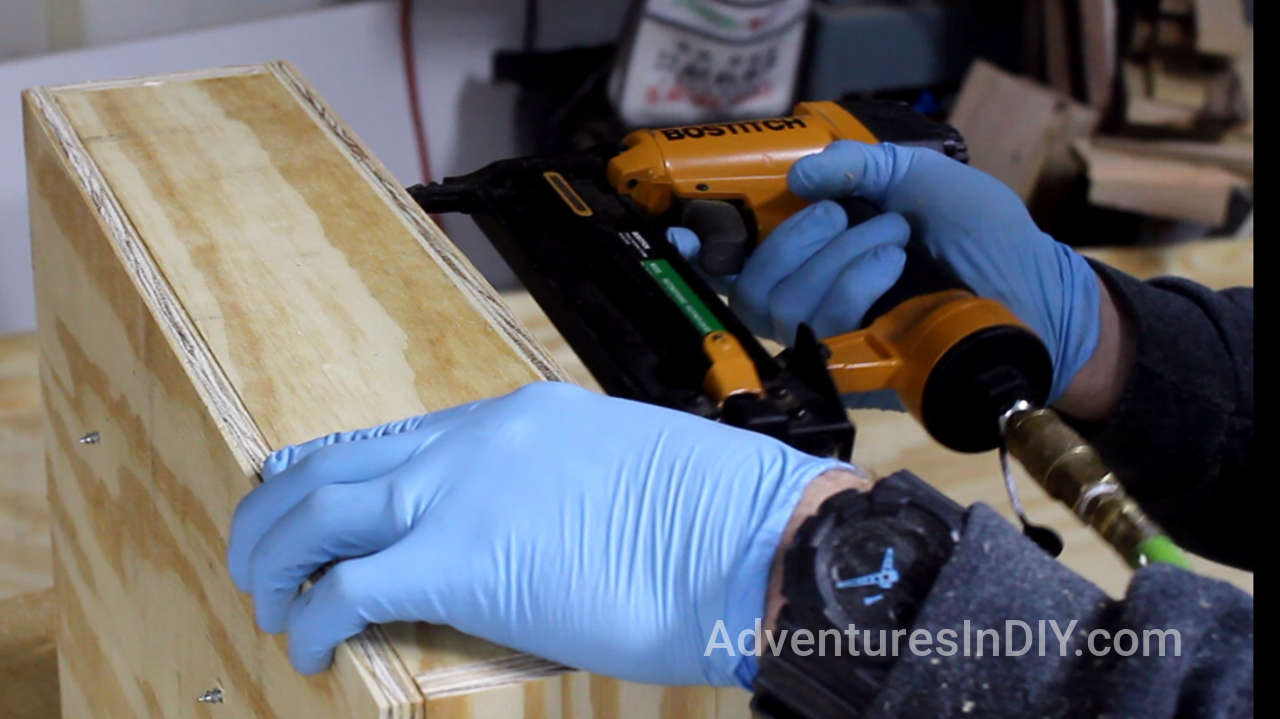
Attaching the Back on a Storage Module
Building the Rolling Bottom
For the rolling base, we’re going to make a tray the bottom modular box sits in and put some wheels on it.

Overall Layout of Rolling Base
There are two different heights for the trim around the base. The front is just shorter than the thickness of 3 pieces of plywood. Since we’ve already talked about how the thickness of ½ inch plywood isn’t ½ inch thick, we’ll use 3 scrap pieces of plywood to set the height of the sides.
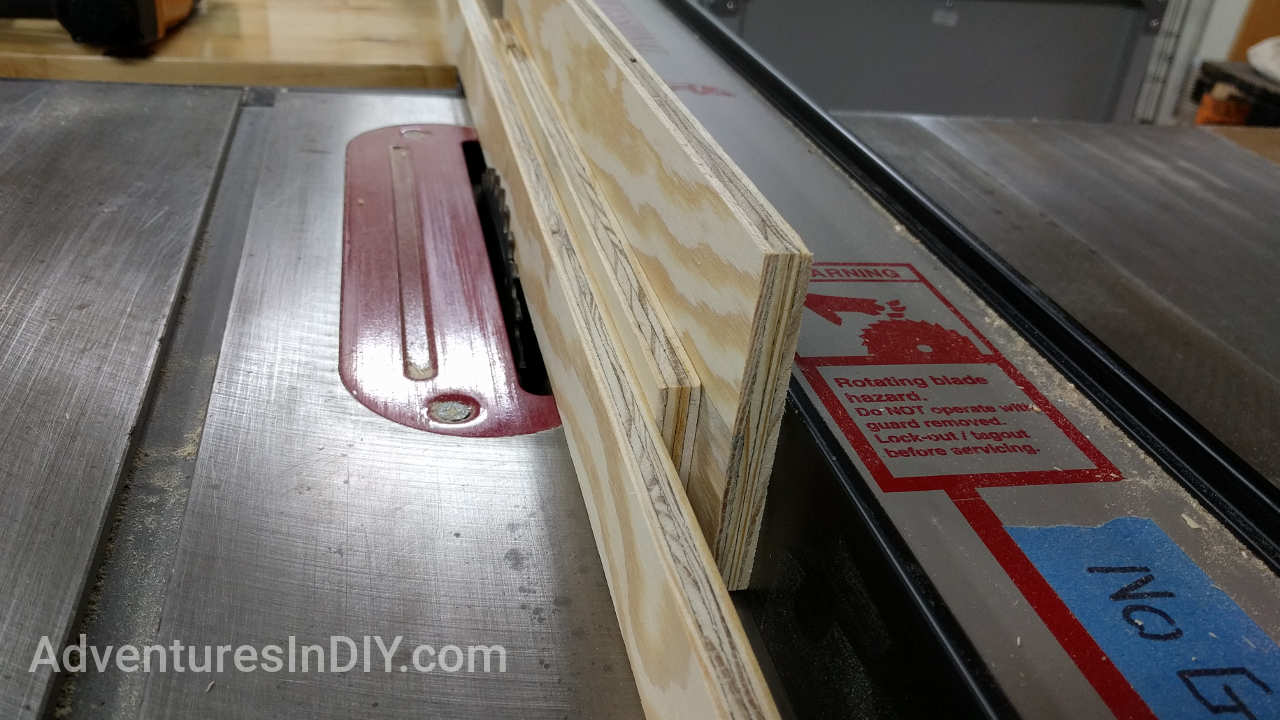
Setting Height Distance or Front Trim
To make the front height a little less than 3 pieces, move your fence so the distance from the blade is 1/16 to â…› inch shorter.
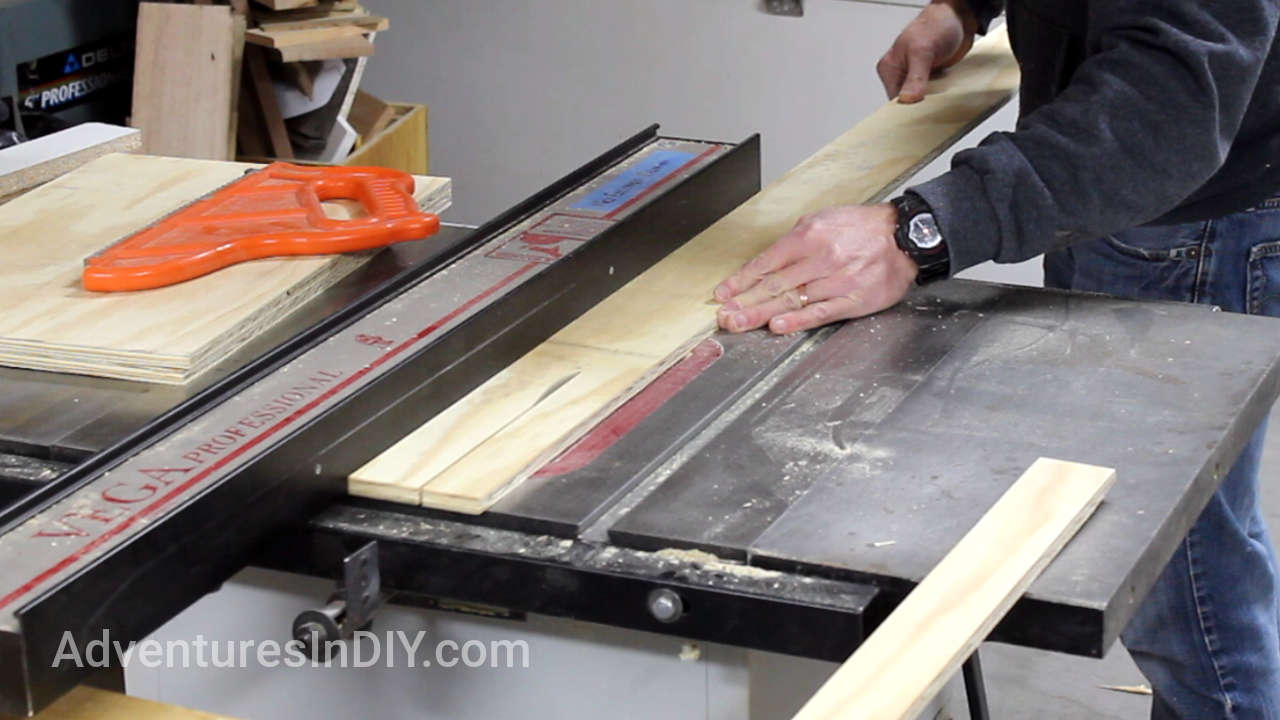
Cutting Rolling Base Trim Pieces
The sides and back are 2 inches high.
Now that we have the sides milled up let’s worked the bottom pieces.
The size of your bottom depends on the largest box you’re making. For me, this was the Stanley one. The Stanley top and bottom pieces are 18 â…ž x 13 ¼ x ½. You’re going to want to add between â…› and 3/16 of an inch to the width and length for a size that is at least 19 x 13 â…œ x ½ .
Cut two pieces of the ½ plywood, glue and nail them together.

Sandwiching Two Pieces of 1/2 Inch Plywood to Make Base Thicker
Use glue and nails to attach the trim side pieces. Paint this sucker up to make it your own. I used some 1/8 inch automotive masking tape to put pin stripes on mine. Just add some wheels and you’re done with the base. I put locking wheels on the front to keep it from moving around.
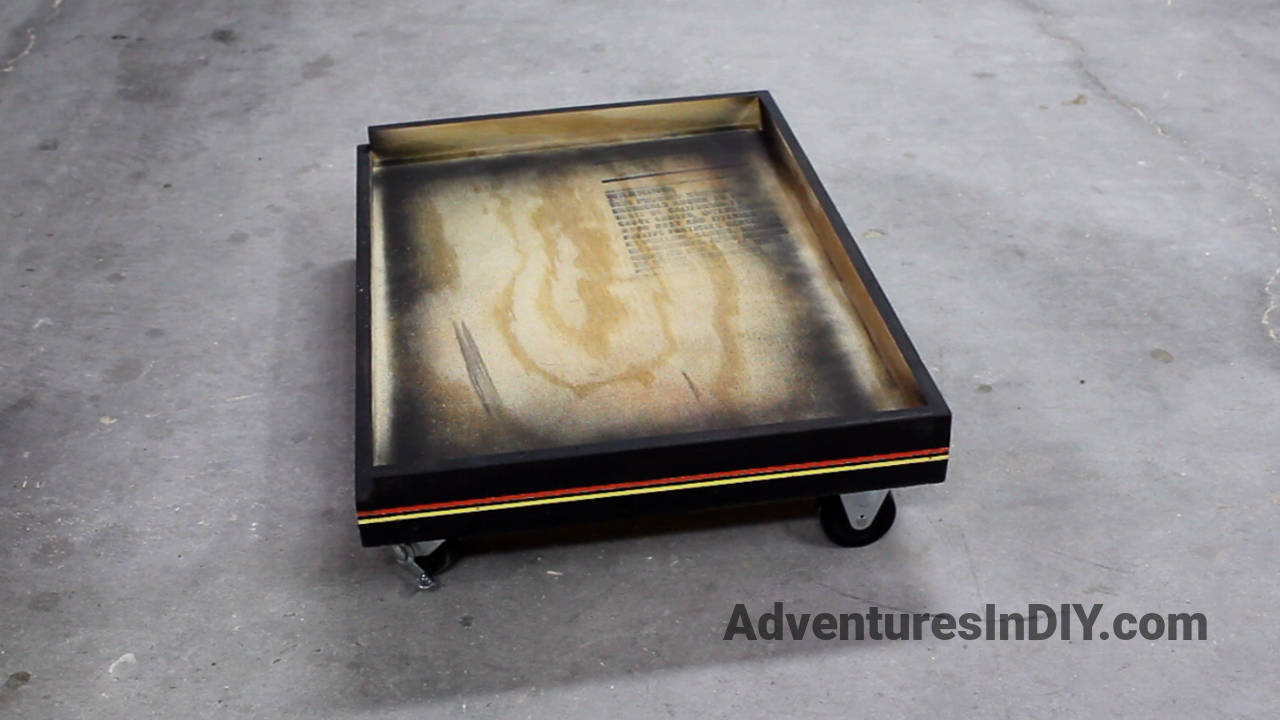
Painted Rolling Base with Wheels
Assembling the Modules Together
To stack the pieces together you’ll want to drive the screws down with a ratcheting screwdriver so the screw tips protrude enough to make a mark on the top of the other module.

Screw Ready For Marking
Align the boxes, then press down to make a mark you can drill pilot holes with. All you need to do now is clamp the two sections together and use the ratchet screwdriver to drive the screws into the top of the box your attaching to.

Screwing Top Module To Module Below
Here is the Sketchup file in case you want to use it to make one for yourself.
Please understand that this file is copyrighted using the Creative Commons Attribution-NonCommercial 3.0 United States (CC BY-NC 3.0 US) license.
If you found this interesting please think about signing up for our email list and get content sent straight to your email when it gets released. Also, we are on the social media sites above and YouTube.