
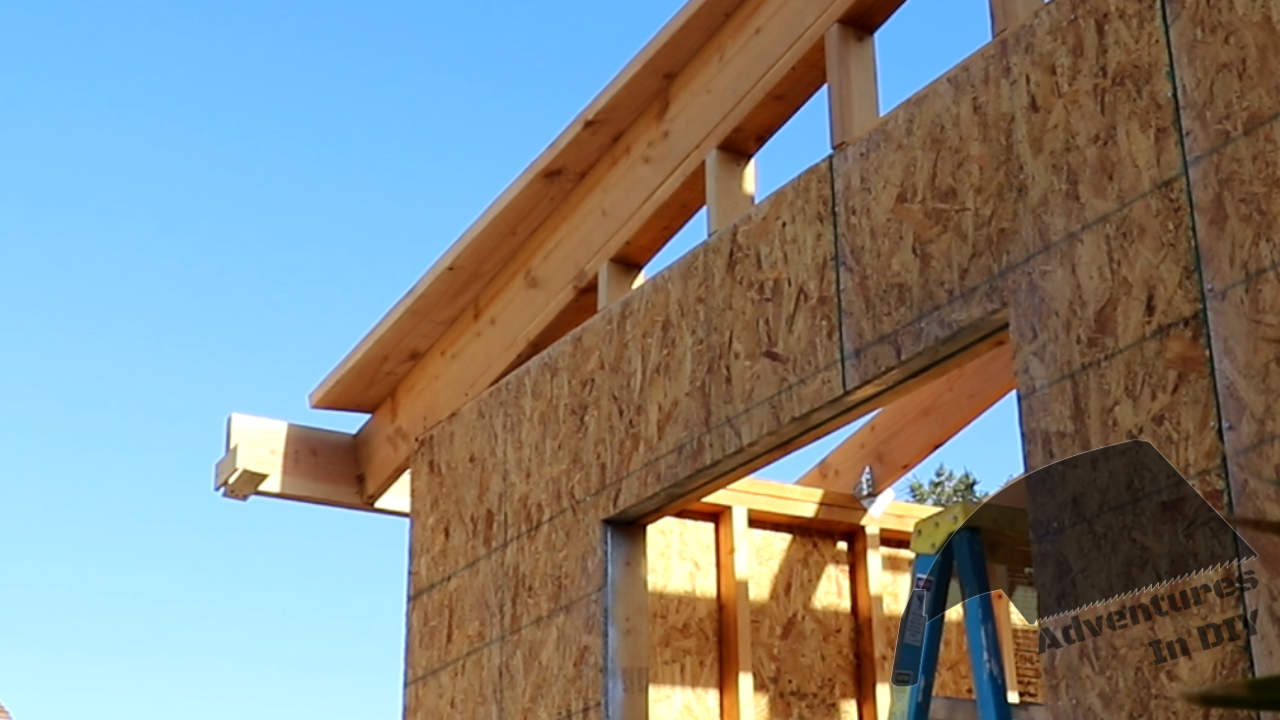
Now that the walls are rigid from the structural sheathing we’re going to tackle the framing the roof. We’re going to use 2×8 lumber to make the roof frame. You’ll see how a speed square and hand saw is your best friend when it comes to cutting the birds-mouths for the rafters. Those 14 foot sub fascia boards are heavy. I’ll share with you how I got those suckers up there.
With all that said, let’s watch the video to get an overview of this before we dive into some details.

Roof Framing Dimensions
Cut the Rafters
To get this thing started, we’re going to cut
(9) 2x8x16 pieces of lumber to 13′ 8″

Rafter Cut Dimensions
Birds-mouth Cutouts on the Rafters
Figuring Out the Rafter Birds-mouth
Our roof is set at a 2:12 ratio. This is a low angled roof at approximately 9.5 degrees, really 9.4623. I was never a big fan of doing things the hard way. So in comes a webpage that will make it a little easier.
This rafter calculator is really useful – https://www.blocklayer.com/roof/raftereng.aspx
The birds-mouth cut out of the rafter needs to account for the thickness of the wall including the sheathing. That’s why we’re going with a 4″ plate where the rafter sits on top of the wall plates.

Birds-Mouth Cut Diagram
When I was laying the rafters out in Sketchup, the birds-mouth near the back needed to be bigger than the one in the front.

Actual Front Birds Mouth Measurements
Instead of using two different layouts, we’re going to use the one for the back. This just means that we need to move the location of the front birds-mouth a little back.

Distance Between Birds-mouth Cutouts On Rafters
How to Use a Speed Square
Before we get going on cutting these out, let’s get familiar with the speed square we’re going to use.
If you don’t have a speed square the swanson speed square is a good one to have.
Test Fit the Birds-mouths
We’re going to start with one rafter, and then transfer the cuts to all the rest. So grab yourself one of those rafters we cut earlier. We’ll start at the back and work our way front, but before we do any cutting let’s make sure it’s going to fit.

Measurements For Birds-mouth Cutouts
Use the diagram above and layout all the measurement marks for the birds-mouths
Measure 1′ 13/16″ to mark the first position of the birds-mouth that will sit on the back shed wall.
Measure 1′ 4 7/8″ to mark the second position of the birds-mouth that will sit on the back shed wall.
Measure and mark 10′ 10 15/16″ from the back of the rafter.
Measure and mark 11′ 3″ from the back of the rafter.
Once everything is laid out on the board put it on the shed for a test fit. For the back wall position, make sure there is enough clearance to accommodate the sheathing.
The 11′ 3″ mark should match up with the front of the wall. It might be a little off because the first birds-mouth is going to be sitting on the back wall.

Birds-Mouth Back Wall Test Fit

Birds-Mouth Front Wall Test Fit
Marking Out and Cutting the Birds-mouths
Start with the birds-mouth closest to the back wall.
Crown the lumber so the crown is on the opposite side of the birds-mouth.
Go to the 1′ 13/16″ measurement mark, and using your speed square line up the number 2 on the common top cut marker, and draw a line.

Using Speed Square to Find Angle
You’re going to measure and mark 11/16″ on this line.

Measuring Birds-mouth Height
Now you just need to connect that line to the second position at 1′ 4 14/16″ from the end of the board to finish the seat cutout.

Drawing Line to Finish Birds-mouth Layout
Just use your favorite saw to cut that out.
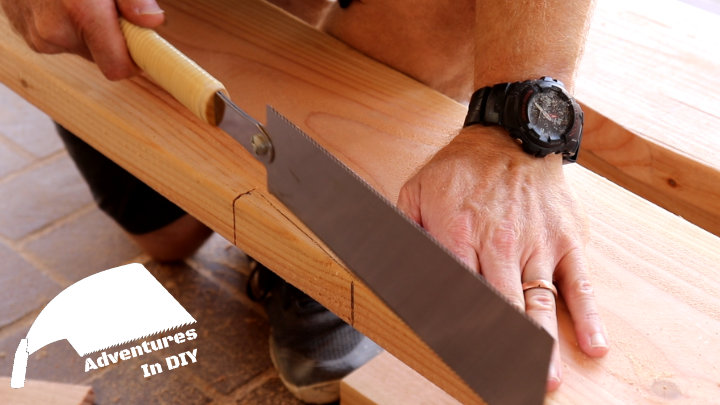
Cutting Birds-mouth On Rafter
If you’re curious about the Japanese ryoba I’m using, I wrote a review recently about it.
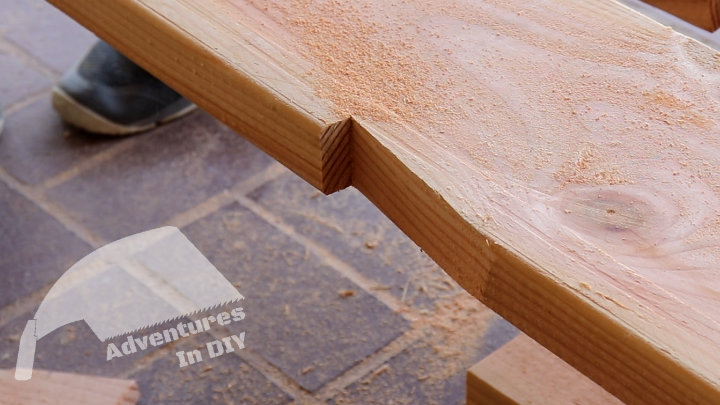
Cut Out Birds-mouth
Move to the measurement mark at 10′ 10 15/16″ and do the same thing we did above.
Before we move on to cutting the rest of the rafters, let’s do one last test fit. It’s better to have to just buy one 2x8x16 instead of 9 😉

Rafter Test Fit On Wall
Cut the Rest of the Rafter Birds-mouths
If everything’s good with the first rafter we cut, we’re going to use that one as a template for the other ones.
Crown the lumber so the crown is on the opposite side of the birds-mouth.
Lay the template rafter on top of the uncut ones and use a pencil to copy the birds-mouth cut areas.

Laying Out Other Rafters Using the Template One
Now you can cut the birds-mouth from the other 6 rafters for a total of 7.
Make sure you leave 2 rafters without birds-mouths for the sides.

Cutting Rest of the Birds-mouths
Layout for Installation
Layout on Wall Plates
We’re going to lay out where the rafters sit on the wall plates just like how we laid out studs in building the walls. The rafters are set 2 feet on center.
Start on the same side of the front and back wall
- Measure from the outside of the wall 1′ 11 ¼” ( 23 ¼”) – this will mark where the outside edge of the rafter is.
- Measure and mark every 2 feet from there.

Laying Out Rafters On Wall Plates
Layout the Sub Fascia Boards
Take two 2x8x14 pieces of lumber and clamp them together.

Clamping Sub Fascia Boards Together For Layout
Just like laying out the wall plates we’re going to layout where the rafters will meet the sub fascia boards.
Make sure you mark which end you started your measurements. When you install the sub fascia, that measurement point should match where you started your measurements for the wall plates.
Start with one side and use the layout dimensions below. You probably see it’s the same as the wall plate layout except you’re adding the 1 foot extensions on each end.

Layout Dimensions for Sub Fascia
Don’t forget to put an X on the side where the rafter will meet the sub fascia.
Layout Side Overhangs
You’ll need 2 rafters with birds-mouth cut outs and the 2 without. Clamp the 4 boards together and use the layout diagram below to mark where the blocking will go.
Make sure to crown the 2 boards without birds-mouth cutouts.
Make sure the birds-mouth rafters are oriented the correct way.

Side Overhang Layout Dimensions
Installing Rafters
Installing the Side Wall Rafters
Install the two rafters that sit on the side walls, the ones we marked in the step above. Once we get those in place we’ll use them to align the other rafters.
Set the rafter on the end and make it flush with the side wall framing.
Double check the birds-mouth spacing with the walls.
Attach the rafter with 3 nails. We’ll be installing angle straps later.

Nailing Side Rafter In Place
Now move to the opposite wall and install the rafter the other way. Make sure the spacing of the birds-mouth with the wall is the same as the first rafter you installed.
Attaching the Layout String
We want to make sure the front of the rafters are aligned with each other. To make this easy, we’re going to attach a string between the two rafters we just installed.
Attaching Guide String to Side Rafters
Attaching More Rafters
Now that we’ve got a guide for how far forward the rafters will sit, let’s install the rest of the rafters with birds-mouth cuts in them.
The process is going to be like the side rafters we installed.
- Line up the rafter with the wall plate layout guide
- Align the front with the layout string
- Nail the rafter in place with 3 nails on each wall plate

Attaching the Rest of the Rafters
Installing Hurricane Ties
We’re going to use galvanized nails to attach hurricane straps to the rafters. This is an optional step depending on your regional codes. They don’t seem like much, but when I installed these things it really made those rafters solid.
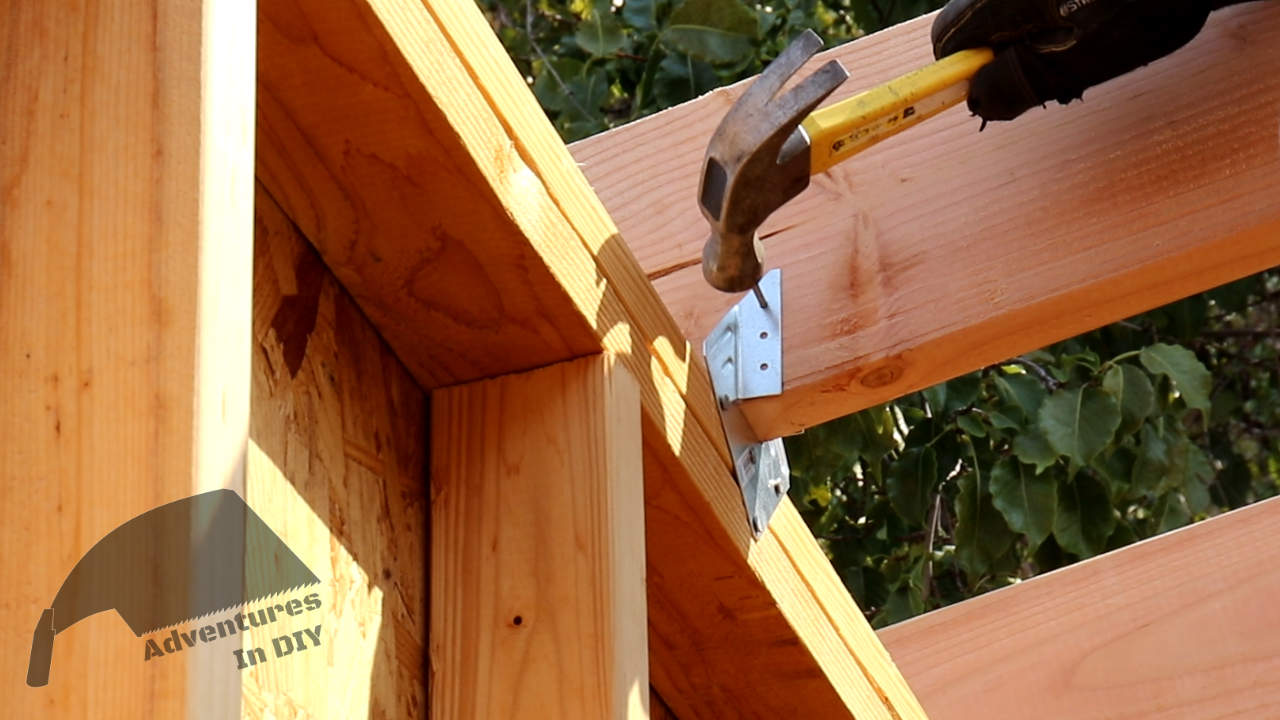
Nailing Hurricane Straps to Rafters
Frame Out Under Side Rafters
Before we finish framing the rest of the roof, let’s frame the wall area under the side rafters. The biggest pain in finishing the side wall is cutting the board that sits under the rafter.

Side Wall Framing Below The Roof
I tried two different methods when cutting the 2x4x10 board that goes under the rafter. The first one involves
- Cutting the piece of the board that meets the front wall at a 9 degree angle
- Clamp the board to the rafter
- Scribe the line to cut on the back
- Cut your board

Marking Cut Line for Board Under Side Rafter
Only down side to this method is there is a good chance you’ll cut the board too short if you don’t give yourself enough buffer from your scribe line.
The second method invloves
- Measuring and cutting the back piece first using the diagram below
- Rough measuring the length of the front cut plus some extra
- Cut the front using a 9 degree angle till it fits

Upper Side Framing Measured Instead Of Scribing the Line
Nail the board you just cut to the bottom of the rafter. Make the outside of the board flush with outside of the rafter before nailing them together.

Nailing Upper Side Wall Support to the Bottom of the Side Rafter
Now we can move on to cutting and nailing the cripple studs in place.
Measure the higher edge of the cripple stud you’re going to cut. You can use the 9 degree angle from before for the top cut.

Measuring the Higher Point of the Cripple Stud for the Cut
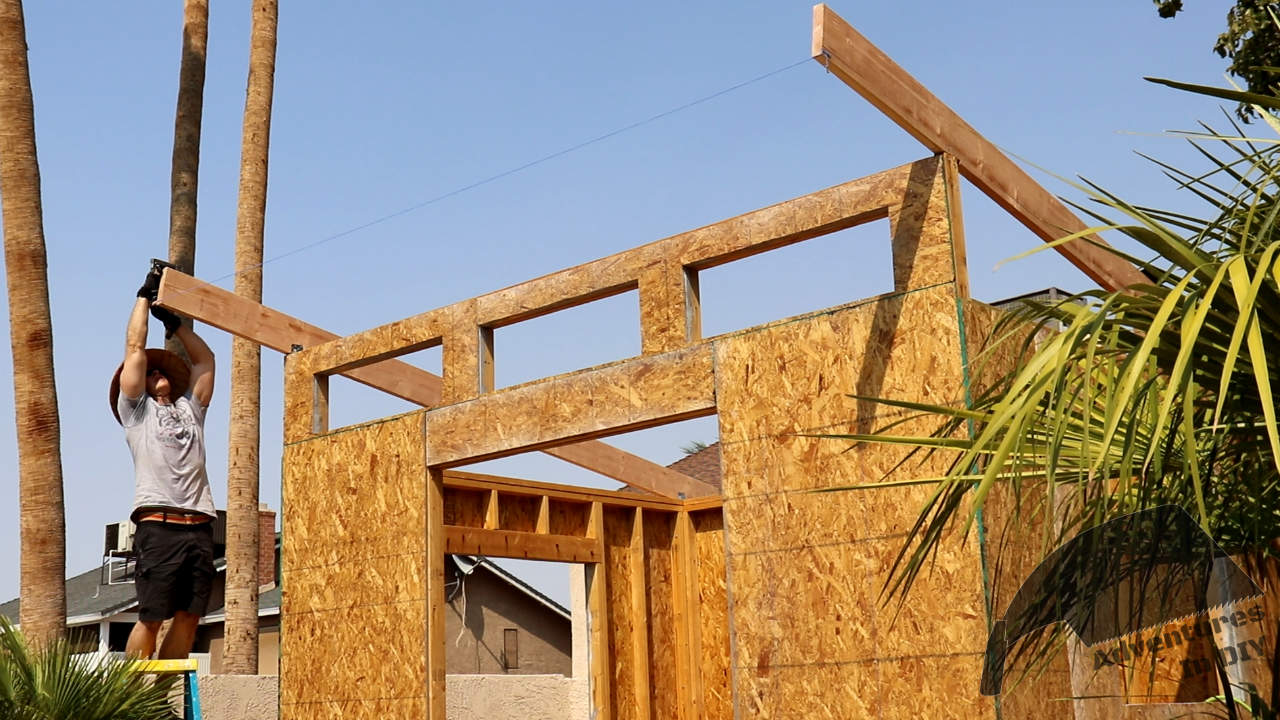
Install the Sub Fascia
Now let’s move onto the sub fascia. These are the two boards that attach to the front and back of the rafters.
We marked these in the previous steps so the hardest part is going to be getting those 14 foot boards up there. In the video I used some guides made from scrap plywood. I tried to use scrap pallet wood but the screws kept splitting the guides.
Roughly cut yourself some 3 x 8 inch long pieces of scrap plywood. It doesn’t have to be exact. The idea is that the guide is
- Wide enough to be bigger than the 1.5 inch thickness of the 2×10
- Long enough to attach the guide with 2 screws at the end of the rafter with enough left over to hold the sub fascia

Cutting Sub Fascia Guides

Installing Sub Fascia Guides Using 2 Screws
When you make your guides for the back fascia use an additional screw to hold the fascia in place while you secure it.

Guide For Back Sub Fascia
Once you get your boards up, line up the marks we made on the sub fascia boards earlier and put 3 -4 nails in.
Make sure the top of the sub fascia is level with the top of the rafter you’re nailing it to. You might have to loosen or remove a guide to line them up.

Nailing the Sub Fascia Board to the Rafters
Attach the Outside Rafters
Just like the sub fascia install, I found it easier to place the side rafters on guides to get them in place.
Guides for Install of Side Overhang Rafters
Make sure the top of the rafter is level with the top of the sub fascia board before you nail it in place.
Also, make sure the marks we made earlier to for the overhang blocking match up. I had to flip mine around.

Nailing Side Overhang Rafter
Install the Blocking for the Outside Rafters
Now that those are in place we can cut the blocking that will go on the side overhang areas.
Cut (12) 10 1/2 inch pieces from the extra 2×8 lumber.
Line them up with the marks on the overhang and side rafters and nail them in place.

Installing Blocking for Side Overhangs
Install the Blocking for the Front and Back Walls
Last thing we need to do is install blocking where the rafters meet the front and back walls. This will seal up the rafter area in at these walls. I kind of did this the hard way.
Because almost all the rafters are 2 feet on center we’re going to cut them all the same to start. Cut 12 pieces from the 2×8 lumber at 22 1/2 inches.
We’re going to install every other rafter so we can nail those in from the side. The other ones will just be toe nailed in place.
The 4 pieces that need to be cut smaller are the rafters that sit on the side walls. It’s easier to just put the piece up there and mark where to make the cut.

Marking Where to Cut Wall Blocking for Side Walls
Unless you feel like using a hatchet and hand plane (or some other painful way to trim the blocking to fit when they’re in place)
- Do a dry fit of the blocking
- When it’s in place mark where the blocking will be level with the rafter
- Rip the blocking to fit
- Nail that sucker in place

Shed Project Running Cost With Roof Framing
Hopefully this article helped you get started on building your shed. If you found this interesting please think about signing up for our email list and get content sent straight to your email when it gets released. Also, we are on the social media sites above and YouTube.
extremely informative. I am thinking about building a shed that is 16×24 and I have never built a shed before. I am trying to accumulate as much knowledge and information as possible before attempting this task. Your video helps a lot.
thanks,