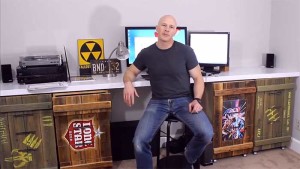
Do you have some cans of spray paint, a spare t-shirt and some common materials to make a stencil? Then you have all the stuff it takes to make a custom t-shirt. I was curious about how well a shirt would last if I just used spray paint on it. See how I made an ammo box looking t-shirt.
The video shows you the process in about 3 minutes (outtakes at the end).
Choosing the Stencil
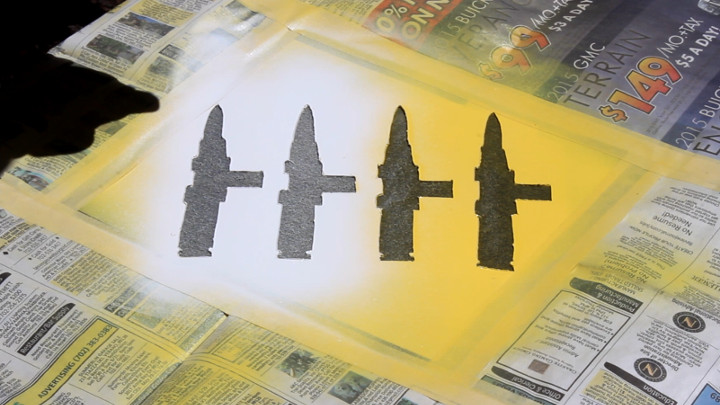
These are stencils I made for the ammo box drawer fronts. They’re plastic dividers for binders that were going to be thrown away. Pretty much you can make a stencil from anything like varying thickness paper or even tape.
[fusion_builder_container hundred_percent=”yes” overflow=”visible”][fusion_builder_row][fusion_builder_column type=”1_1″ background_position=”left top” background_color=”” border_size=”” border_color=”” border_style=”solid” spacing=”yes” background_image=”” background_repeat=”no-repeat” padding=”” margin_top=”0px” margin_bottom=”0px” class=”” id=”” animation_type=”” animation_speed=”0.3″ animation_direction=”left” hide_on_mobile=”no” center_content=”no” min_height=”none”]
Ammo Box Drawer Fronts For Office Cabinets
Materials
The shirt used is just an inexpensive 100% cotton fruit of the loom shirt. Because this project is about using paint I already had, the paint is Rustoleum white and yellow.
To make sure the shirt stays flat I’m using some foam core but you can use any scrap plywood or hardboard.
[/fusion_builder_column][fusion_builder_column type=”1_1″ background_position=”left top” background_color=”” border_size=”” border_color=”” border_style=”solid” spacing=”yes” background_image=”” background_repeat=”no-repeat” padding=”” margin_top=”0px” margin_bottom=”0px” class=”” id=”” animation_type=”” animation_speed=”0.3″ animation_direction=”left” hide_on_mobile=”no” center_content=”no” min_height=”none”]

Foam Core T-Shirt Backing Board
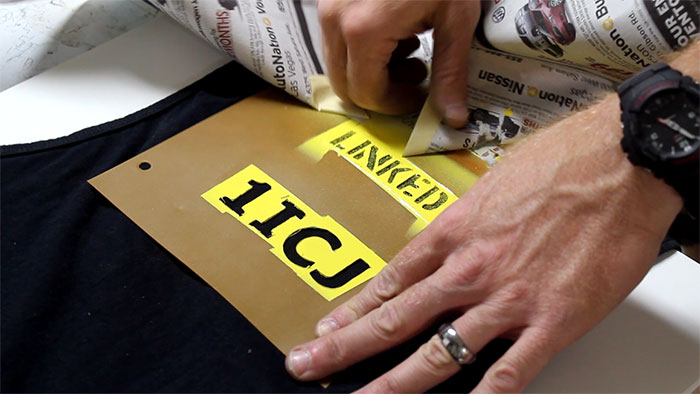
Sticking the Stencils to the Shirt
So the stencils don’t move use spray adhesive to keep them on the shirts. If you let it dry for a minute the adhesive will just be tacky and not leave adhesive on the shirt. I know this because I was impatient with the “Linked” stencil and it left residue on the shirt. The residue ended up coming out with the first wash.
[/fusion_builder_column][fusion_builder_column type=”1_1″ background_position=”left top” background_color=”” border_size=”” border_color=”” border_style=”solid” spacing=”yes” background_image=”” background_repeat=”no-repeat” padding=”” margin_top=”0px” margin_bottom=”0px” class=”” id=”” animation_type=”” animation_speed=”0.3″ animation_direction=”left” hide_on_mobile=”no” center_content=”no” min_height=”none”]
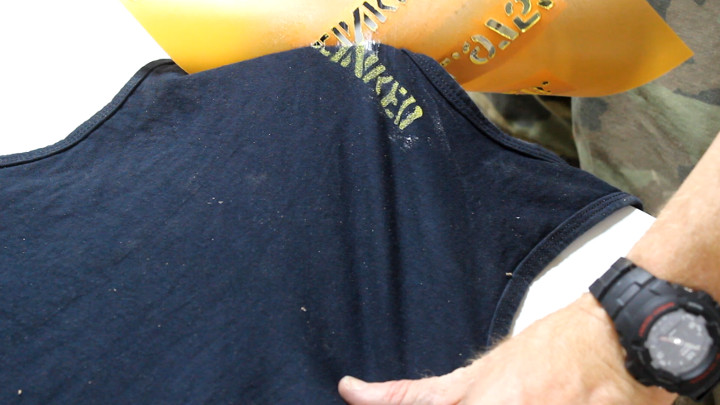
Wait For Adhesive To Dry Some Otherwise The Stencil Will Leave Residue On Shirt
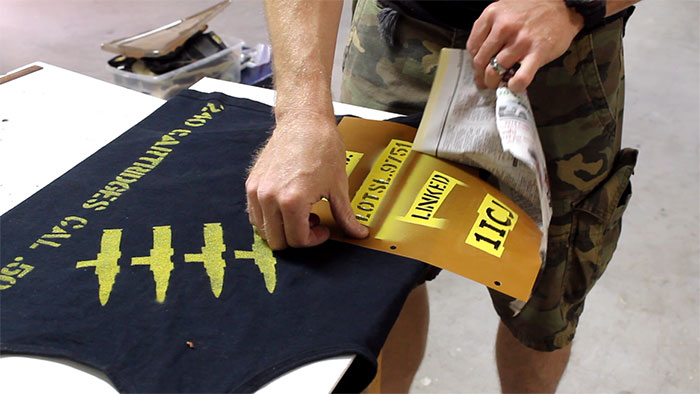
Masking
After you position the stencil on the shirt, use tape and newspaper to mask off anything you don’t want to paint.
[/fusion_builder_column][fusion_builder_column type=”1_1″ background_position=”left top” background_color=”” border_size=”” border_color=”” border_style=”solid” spacing=”yes” background_image=”” background_repeat=”no-repeat” padding=”” margin_top=”0px” margin_bottom=”0px” class=”” id=”” animation_type=”” animation_speed=”0.3″ animation_direction=”left” hide_on_mobile=”no” center_content=”no” min_height=”none”]

Masking Off For Painting
Painting
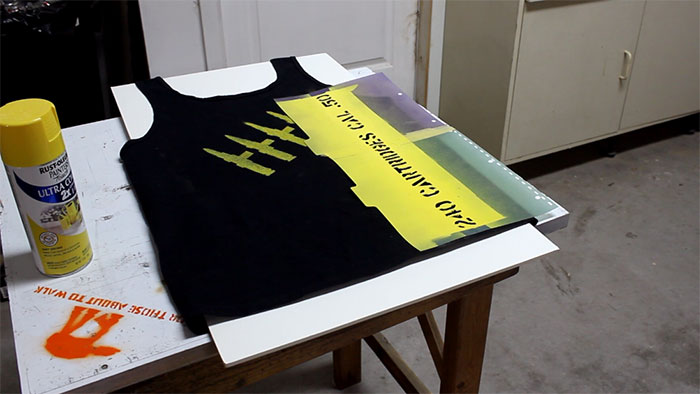
Because I thought the yellow paint might not show up that well on the black shirt, I sprayed 2 coats of Rustoleum white paint first and then 2 coats of Rustoleum yellow paint.
[/fusion_builder_column][fusion_builder_column type=”1_1″ background_position=”left top” background_color=”” border_size=”” border_color=”” border_style=”solid” spacing=”yes” background_image=”” background_repeat=”no-repeat” padding=”” margin_top=”0px” margin_bottom=”0px” class=”” id=”” animation_type=”” animation_speed=”0.3″ animation_direction=”left” hide_on_mobile=”no” center_content=”no” min_height=”none”]
2 Coats Of White and 2 Coats Of Yellow
More Painting
I still haven’t kicked my ammo box habit so I made the shirt look like an ammo box with the rest of the stencils.
[/fusion_builder_column][fusion_builder_column type=”1_1″ background_position=”left top” background_color=”” border_size=”” border_color=”” border_style=”solid” spacing=”yes” background_image=”” background_repeat=”no-repeat” padding=”” margin_top=”0px” margin_bottom=”0px” class=”” id=”” animation_type=”” animation_speed=”0.3″ animation_direction=”left” hide_on_mobile=”no” center_content=”no” min_height=”none”]
50 Caliber Stencil For Painted Shirt
[/fusion_builder_column][fusion_builder_column type=”1_1″ background_position=”left top” background_color=”” border_size=”” border_color=”” border_style=”solid” spacing=”yes” background_image=”” background_repeat=”no-repeat” padding=”” margin_top=”0px” margin_bottom=”0px” class=”” id=”” animation_type=”” animation_speed=”0.3″ animation_direction=”left” hide_on_mobile=”no” center_content=”no” min_height=”none”]
Lot Number Stencil For Shirt
[/fusion_builder_column][fusion_builder_column type=”1_1″ background_position=”left top” background_color=”” border_size=”” border_color=”” border_style=”solid” spacing=”yes” background_image=”” background_repeat=”no-repeat” padding=”” margin_top=”0px” margin_bottom=”0px” class=”” id=”” animation_type=”” animation_speed=”0.3″ animation_direction=”left” hide_on_mobile=”no” center_content=”no” min_height=”none”]
Linked Stencil On Back Of Shirt
The paint ended up saturating through some of the cloth.
[/fusion_builder_column][fusion_builder_column type=”1_1″ background_position=”left top” background_color=”” border_size=”” border_color=”” border_style=”solid” spacing=”yes” background_image=”” background_repeat=”no-repeat” padding=”” margin_top=”0px” margin_bottom=”0px” class=”” id=”” animation_type=”” animation_speed=”0.3″ animation_direction=”left” hide_on_mobile=”no” center_content=”no” min_height=”none”]
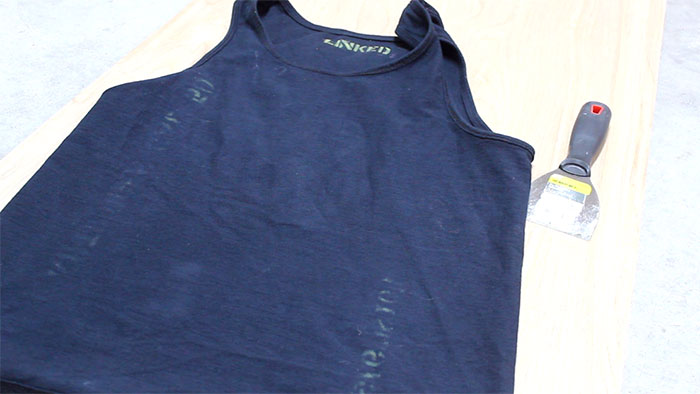
Paint Saturated Cloth
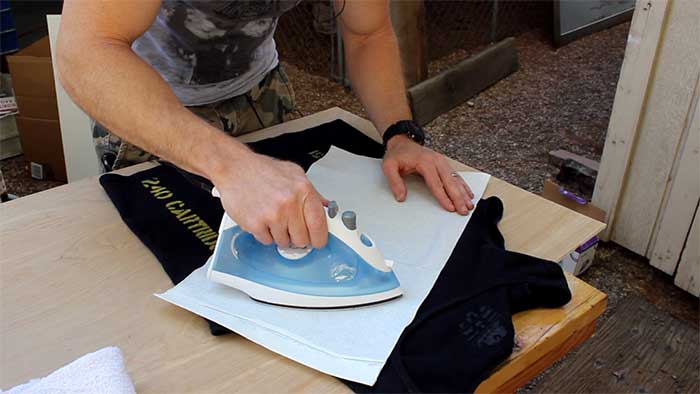
Heat Treating
I saw online somewhere that heat treating would help set the paint. To stay out of trouble, I have an iron that is specifically for project. With the iron set to the cotton setting I tried to use a towel between the iron and t-shirt. Not enough heat was getting through so I switched to a paper towel. This seemed to heat the shirt sufficiently.
[/fusion_builder_column][fusion_builder_column type=”1_1″ background_position=”left top” background_color=”” border_size=”” border_color=”” border_style=”solid” spacing=”yes” background_image=”” background_repeat=”no-repeat” padding=”” margin_top=”0px” margin_bottom=”0px” class=”” id=”” animation_type=”” animation_speed=”0.3″ animation_direction=”left” hide_on_mobile=”no” center_content=”no” min_height=”none”]
Heat Treating Paint With An Iron
First Wash
I ended up waiting a day before the first washing. This wasn’t intentional but more of a by product of having to clean the garage and being too tired to mess with the shirt till the next day.
[/fusion_builder_column][fusion_builder_column type=”1_1″ background_position=”left top” background_color=”” border_size=”” border_color=”” border_style=”solid” spacing=”yes” background_image=”” background_repeat=”no-repeat” padding=”” margin_top=”0px” margin_bottom=”0px” class=”” id=”” animation_type=”” animation_speed=”0.3″ animation_direction=”left” hide_on_mobile=”no” center_content=”no” min_height=”none”]
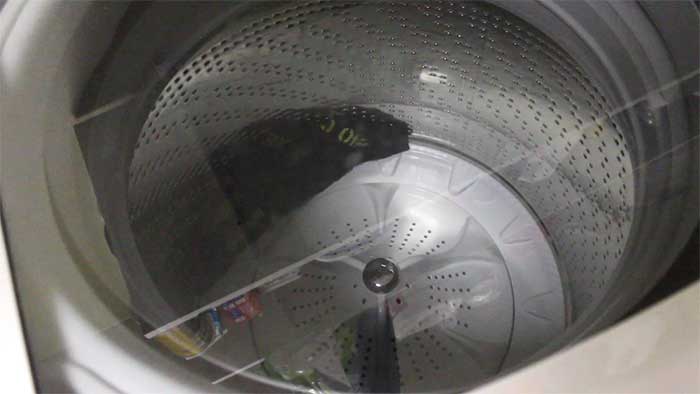
Washing Painted Shirt For First Time
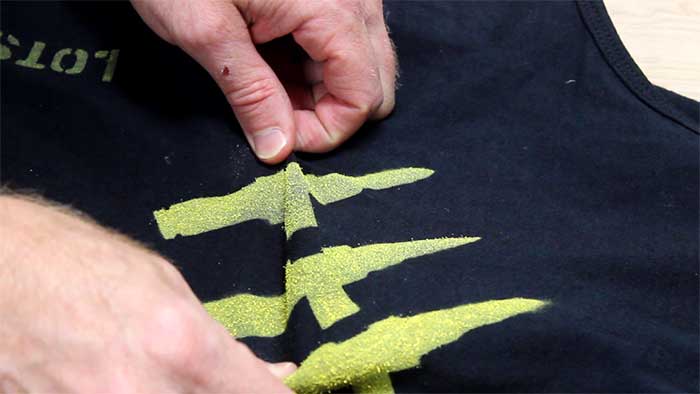
Durable
After the wash and dry cycle it was still pretty durable. I was able to pull on the painted area of the shirt without it cracking.
[/fusion_builder_column][fusion_builder_column type=”1_1″ background_position=”left top” background_color=”” border_size=”” border_color=”” border_style=”solid” spacing=”yes” background_image=”” background_repeat=”no-repeat” padding=”” margin_top=”0px” margin_bottom=”0px” class=”” id=”” animation_type=”” animation_speed=”0.3″ animation_direction=”left” hide_on_mobile=”no” center_content=”no” min_height=”none”]
Showing The Durability Of The Paint On The Shirt
Only thing is the shirt is really inexpensive and the cotton fabric has fibers that stick up slightly. The these straight up fibers were painted causing a raised pilling effect.
[/fusion_builder_column][fusion_builder_column type=”1_1″ background_position=”left top” background_color=”” border_size=”” border_color=”” border_style=”solid” spacing=”yes” background_image=”” background_repeat=”no-repeat” padding=”” margin_top=”0px” margin_bottom=”0px” class=”” id=”” animation_type=”” animation_speed=”0.3″ animation_direction=”left” hide_on_mobile=”no” center_content=”no” min_height=”none”]

Small Fibers Caused A Pilling Effect
Scraping
I didn’t want those things falling off me like yellow dandruff so I got rid of it by scraping it with a putty knife.
[/fusion_builder_column][fusion_builder_column type=”1_1″ background_position=”left top” background_color=”” border_size=”” border_color=”” border_style=”solid” spacing=”yes” background_image=”” background_repeat=”no-repeat” padding=”” margin_top=”0px” margin_bottom=”0px” class=”” id=”” animation_type=”” animation_speed=”0.3″ animation_direction=”left” hide_on_mobile=”no” center_content=”no” min_height=”none”]
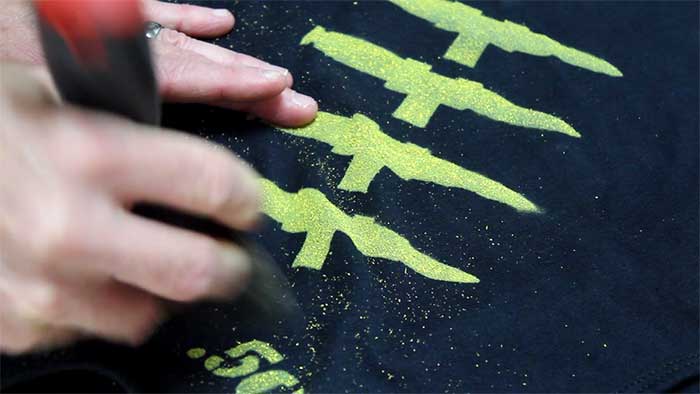
Scraping Painted Fibers With A Putty Knife
Final Spray Painted Shirt Design
The shirt has gone through its 5th washing now and hasn’t faded.
[/fusion_builder_column][fusion_builder_column type=”1_1″ background_position=”left top” background_color=”” border_size=”” border_color=”” border_style=”solid” spacing=”yes” background_image=”” background_repeat=”no-repeat” padding=”” margin_top=”0px” margin_bottom=”0px” class=”” id=”” animation_type=”” animation_speed=”0.3″ animation_direction=”left” hide_on_mobile=”no” center_content=”no” min_height=”none”]
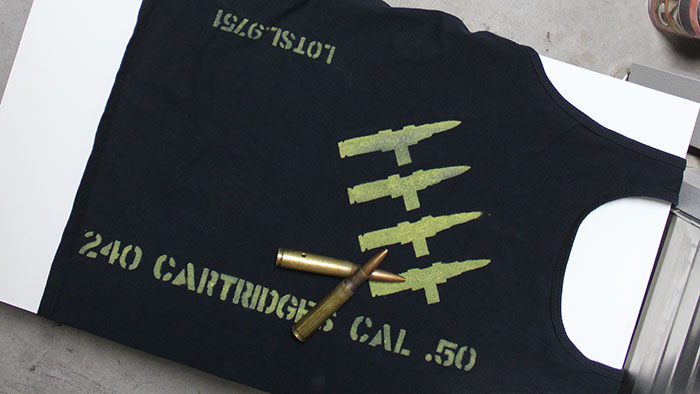
Ammo Box Shirt Painted With Spray Paint
If you enjoyed this content please subscribe to our newsletter so you get the latest content when it comes out. Also, please check us out on the social media links so you can follow behind the scenes of projects as their being done.[/fusion_builder_column][/fusion_builder_row][/fusion_builder_container]