Now that we’ve built the foundation for our modern work shed we can move on to framing up the floor. We’ll take a look at something called crowning, see how to position the skids for the floor to be built on, layout the rim joists so the rest is easy, how to assemble it all together. Also, there’s a complete materials list for this part at the end of the article.
What Is Crowning Lumber?
When you buy lumber it’s not going to be perfectly straight. A lot of times there will be one side that has a slight hump in it. You’ll want to make sure that is oriented up when you use the board. The video below explains this in a more detail.
You’re going to use this technique for every piece of lumber we’re assembling.
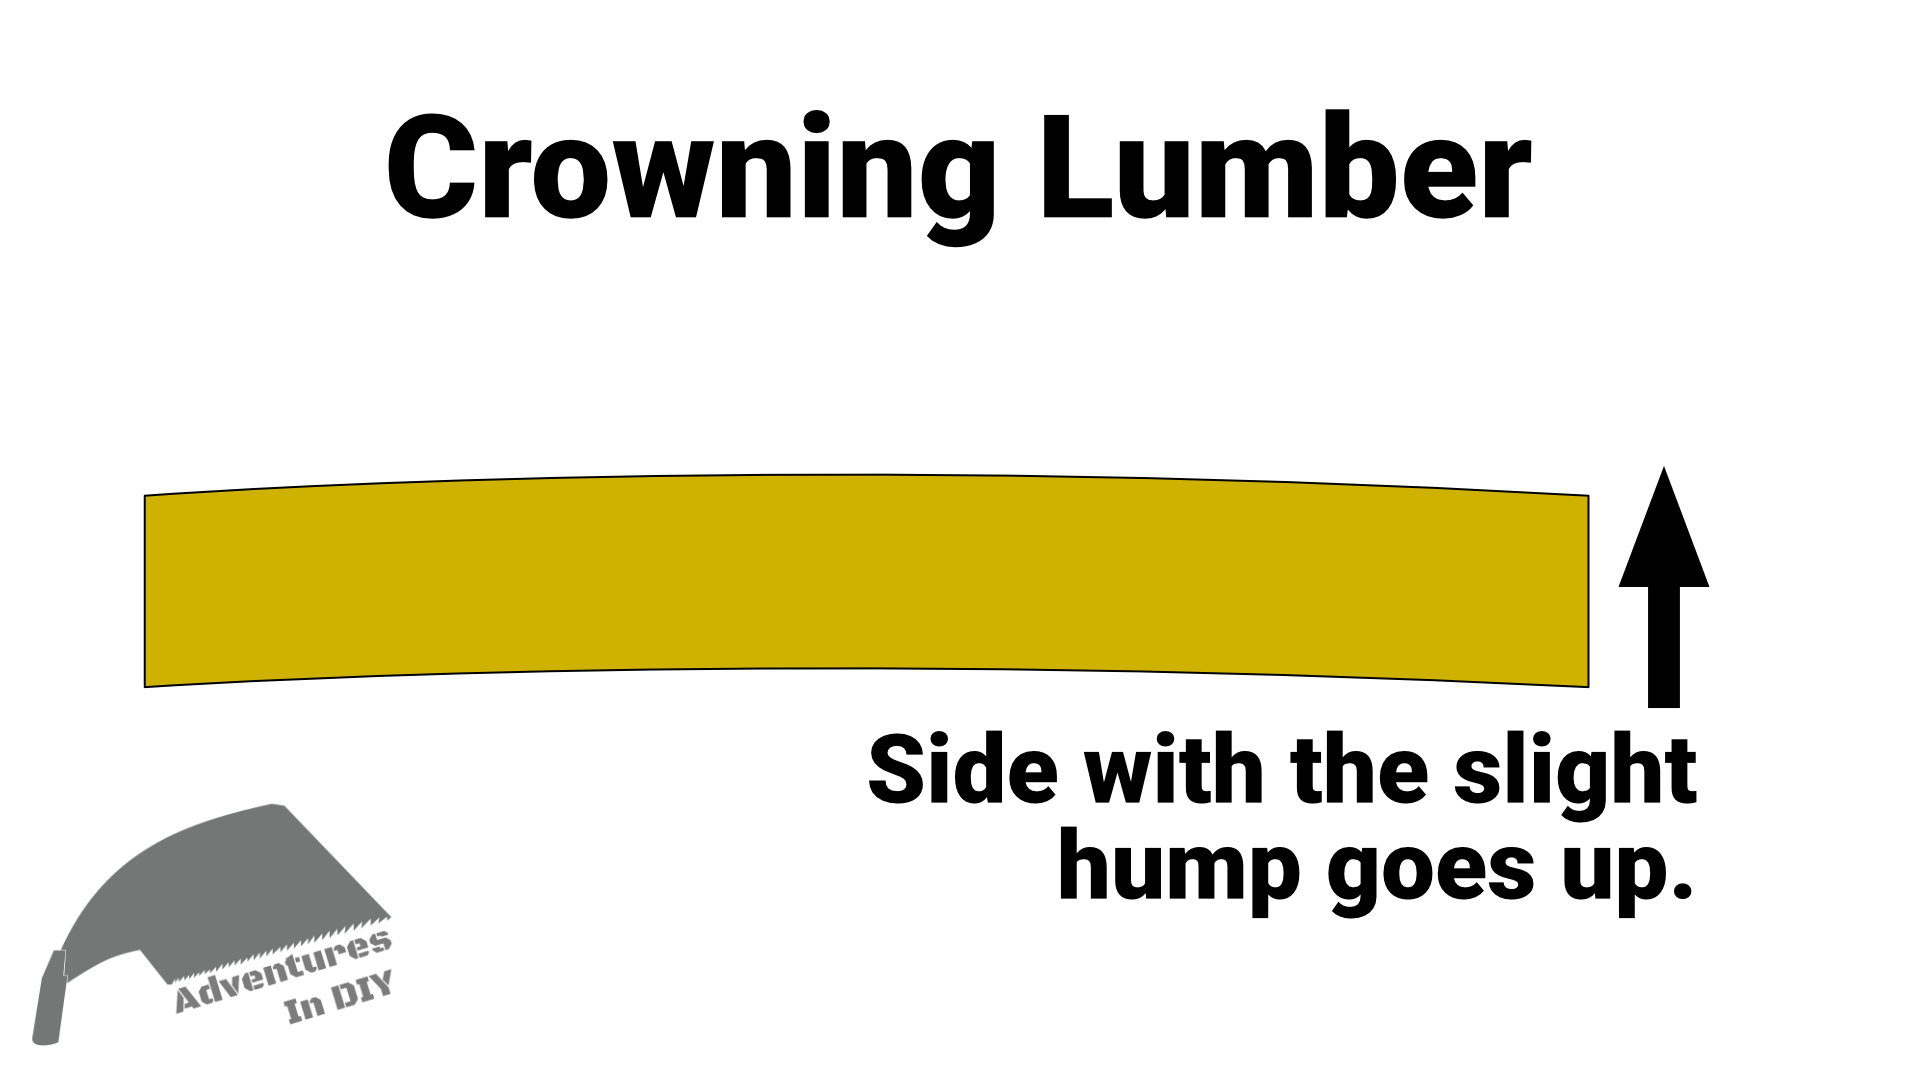
Crowning Lumber
Laying Out The 4x4s
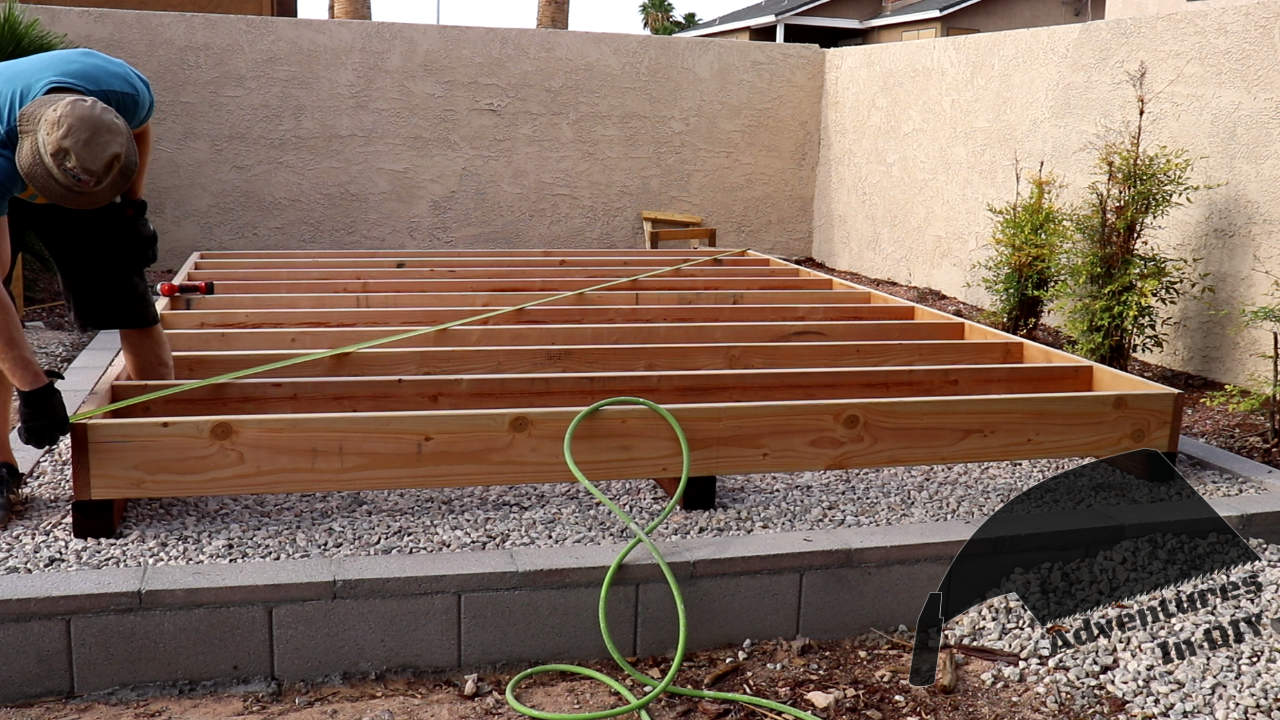
Start by figuring out how you want your shed to be positioned on your foundation. I’m using the block wall as the reference points for measurements.
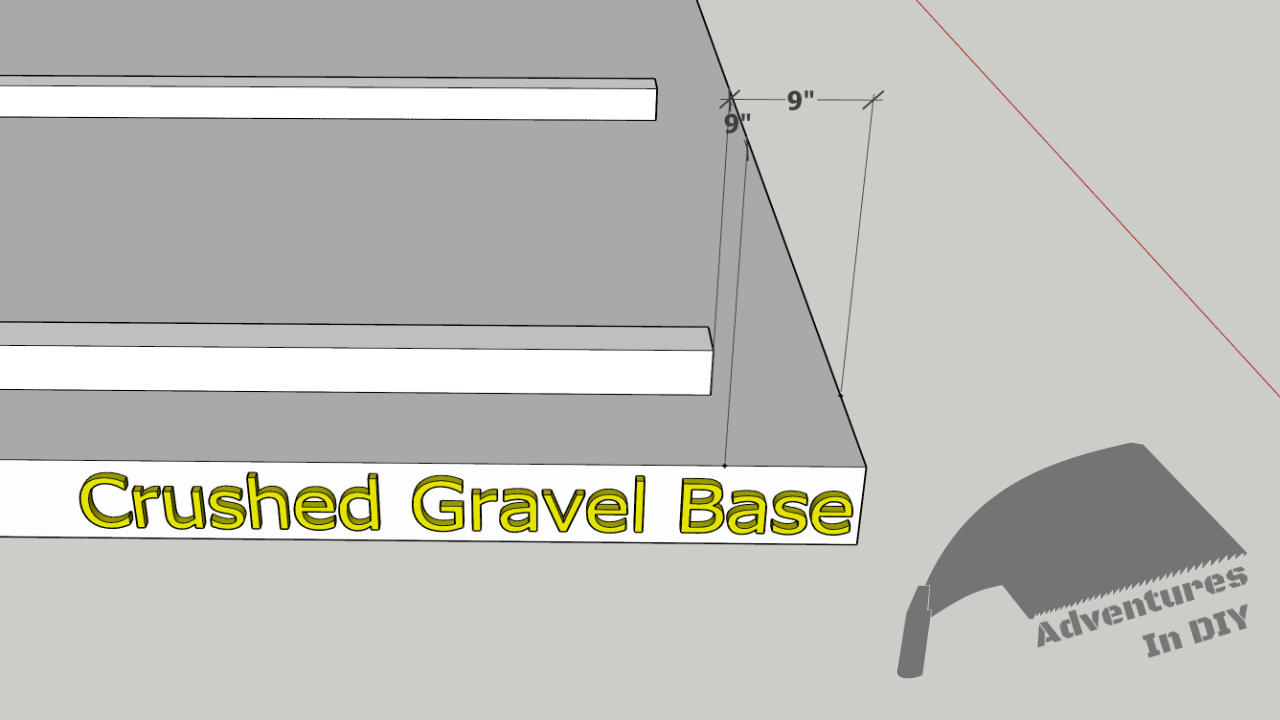
Shed Floor Orientation On The Foundation
Once you set the first one you can use that to set the other two pressure treated 4 x 4 timbers.
Assembling The Floor
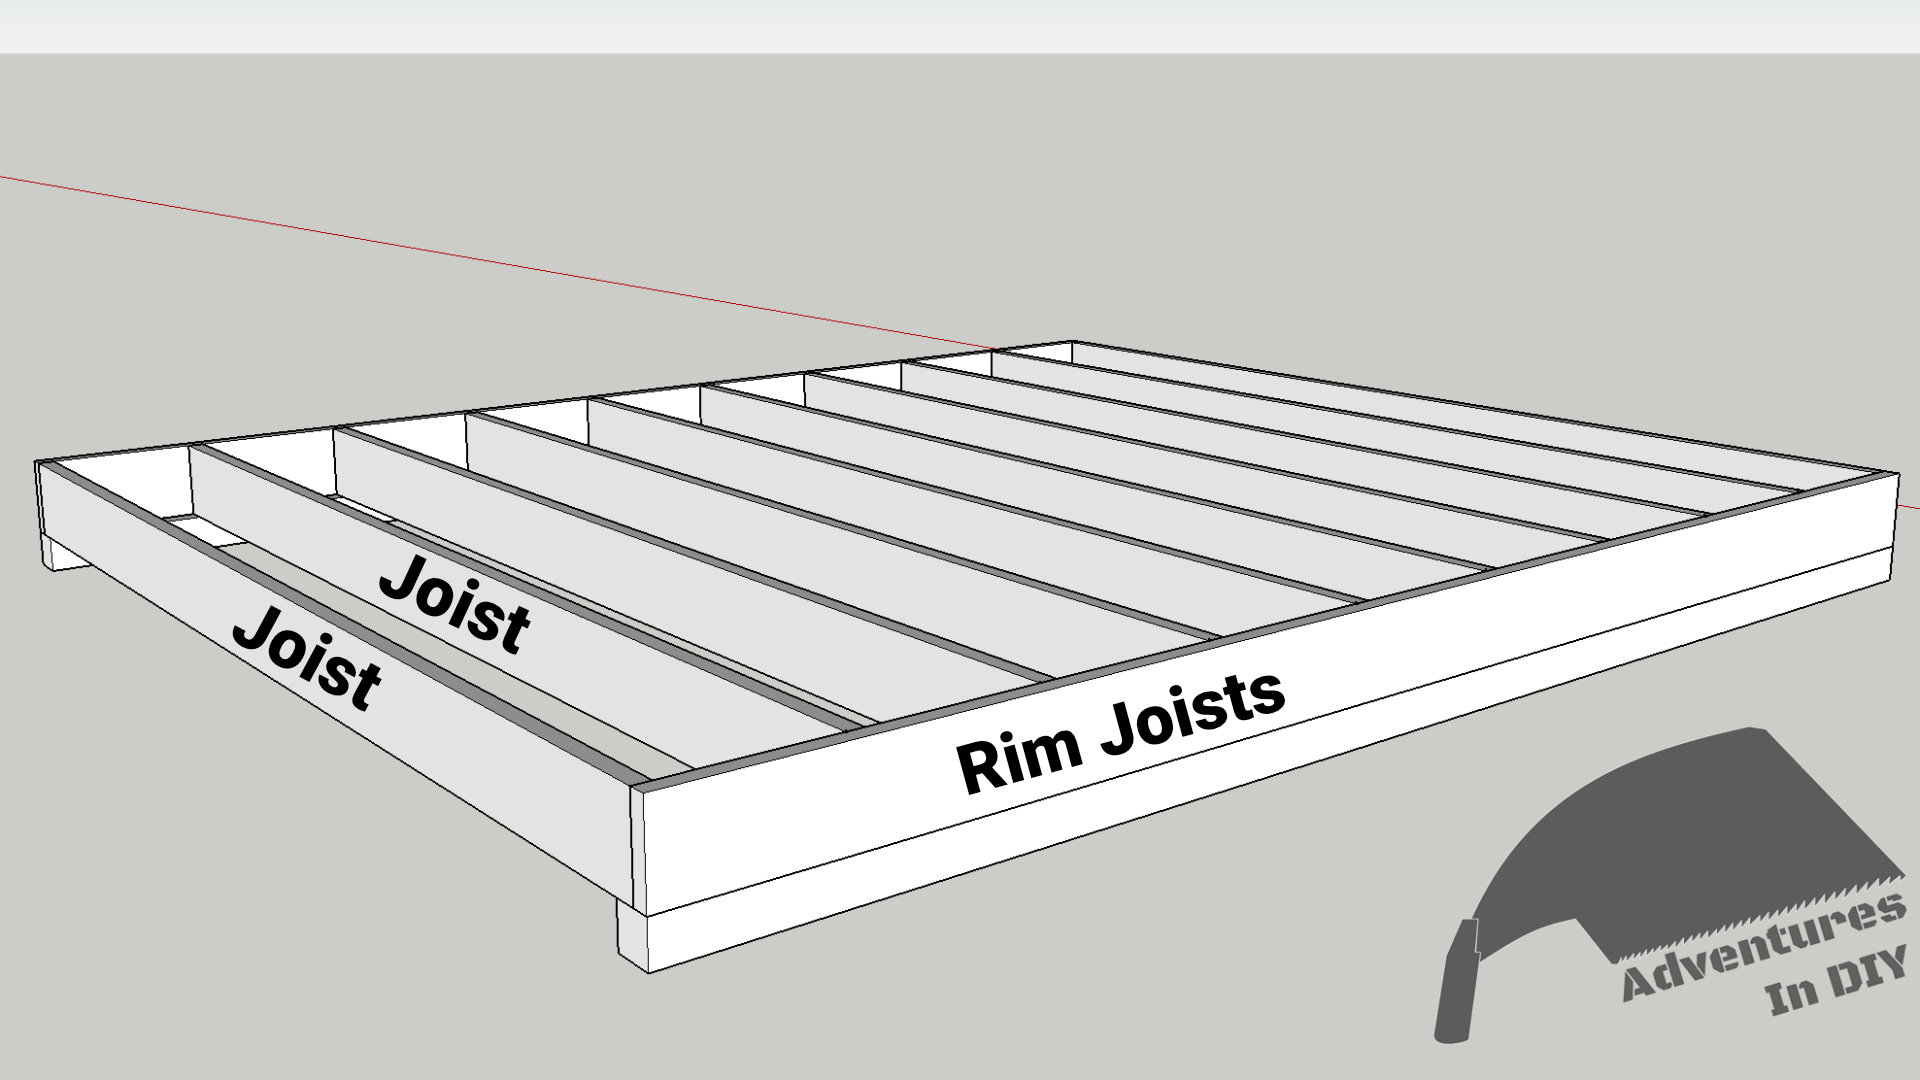
Floor Assembly Showing Joists and Rim Joists
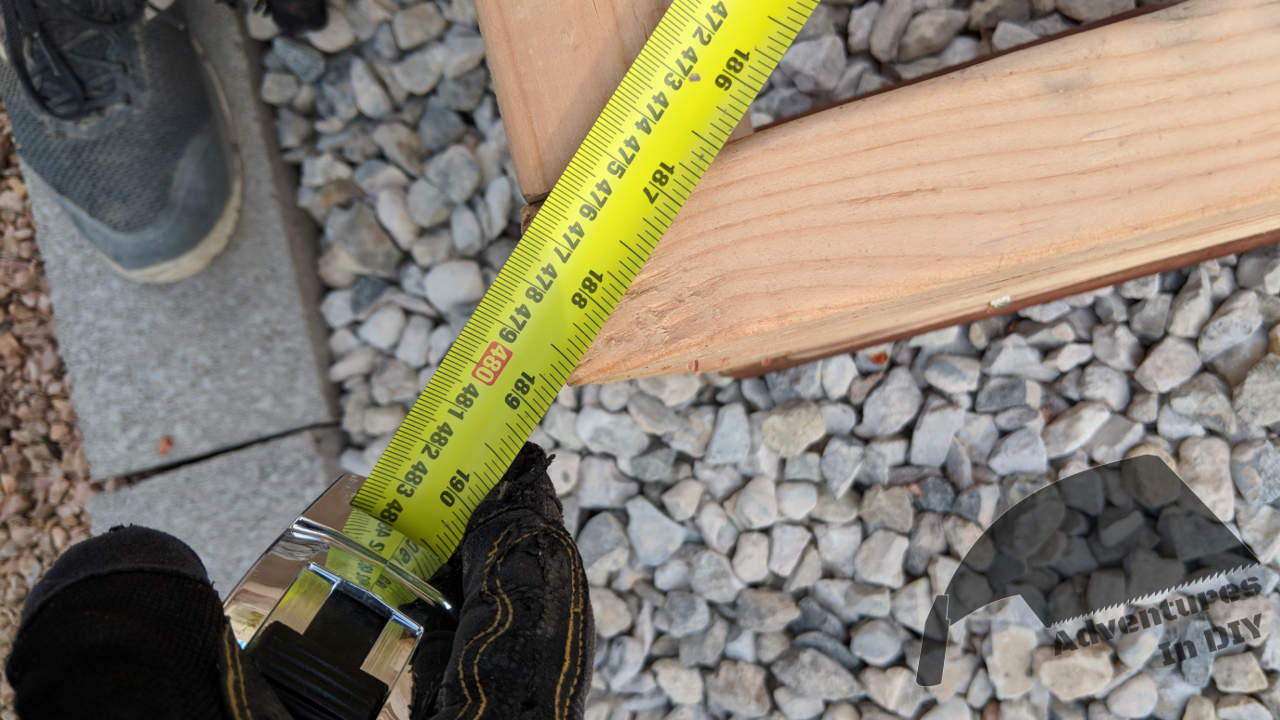
Layout Marks On Rim Joist Boards
Line up both 2x8x12 inch boards with the crown side up and we’ll mark where the joists will go. We’re going to layout the joists 16 inches (1′ 4″) on center. The traditional way to do this is
- Start by marking 16 ¾ inches (1′ 4 ¾”) on one side
- Make the rest of the marks at 16 inches
The first measurement will give you a guide to the outside of the first floor joist. We’re making the first mark at 16 ¾ inches because the 2×8 is really 1 ½ inches x 7 ½ inches.
From that measurement, you’ll mark 16 inches (1′ 4″). You’re still marking the outside of the next joist because we’re measuring from that first offset.
What I found easiest was to find the 16 inch center and then mark ¾ inch on each side.
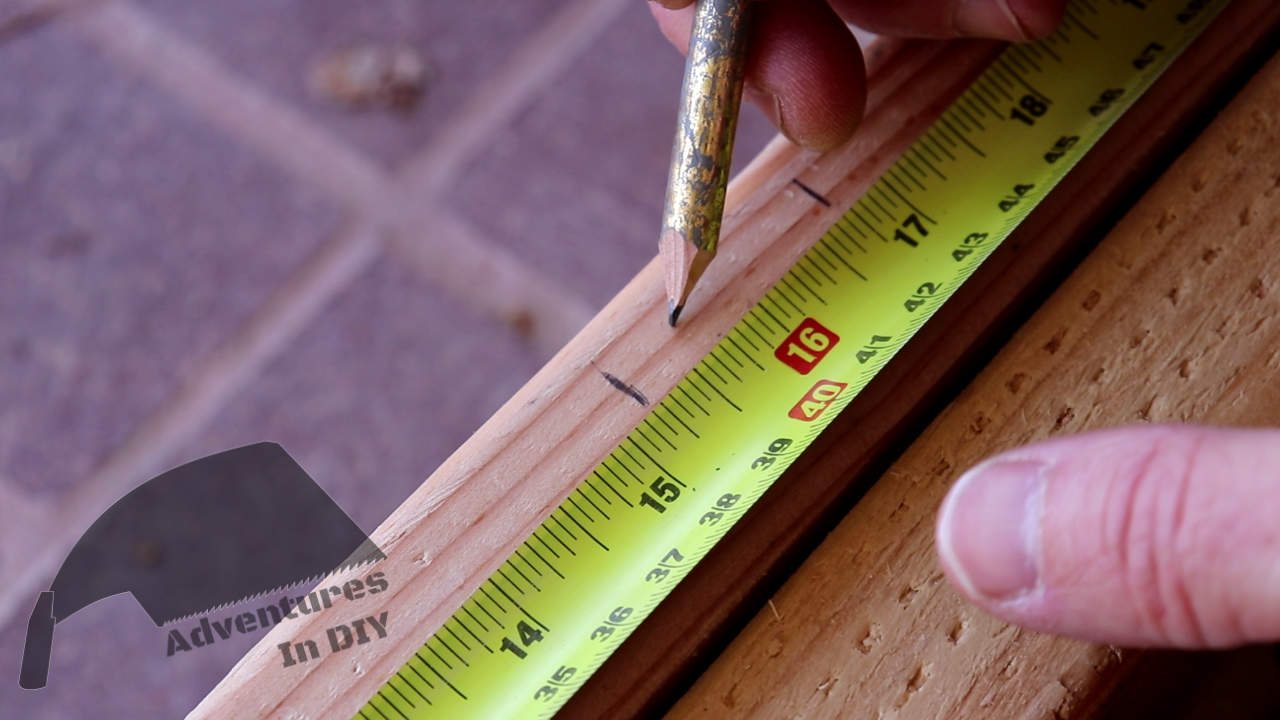
Marking Rim Joists For Joist Locations
Each 16 inches on your tape measure is red instead of black it’s easy to see that and then just mark either side.
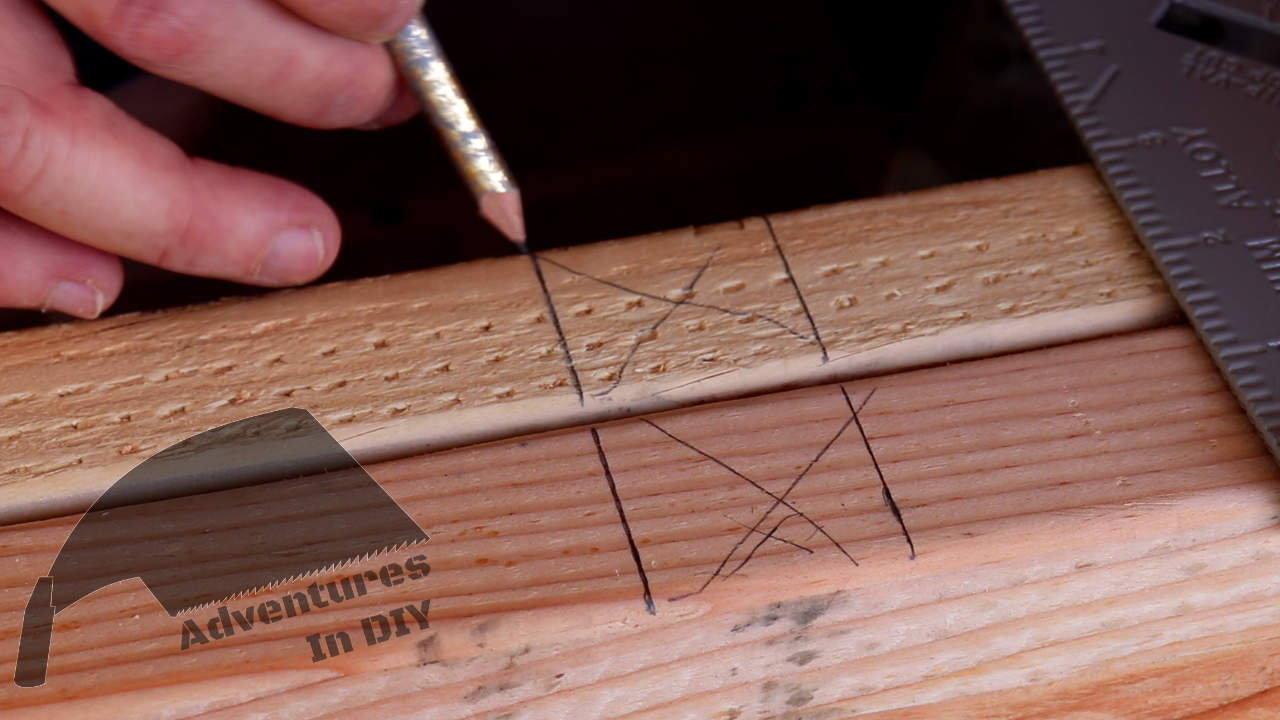
Annotating Rim Joist For Joist Placement
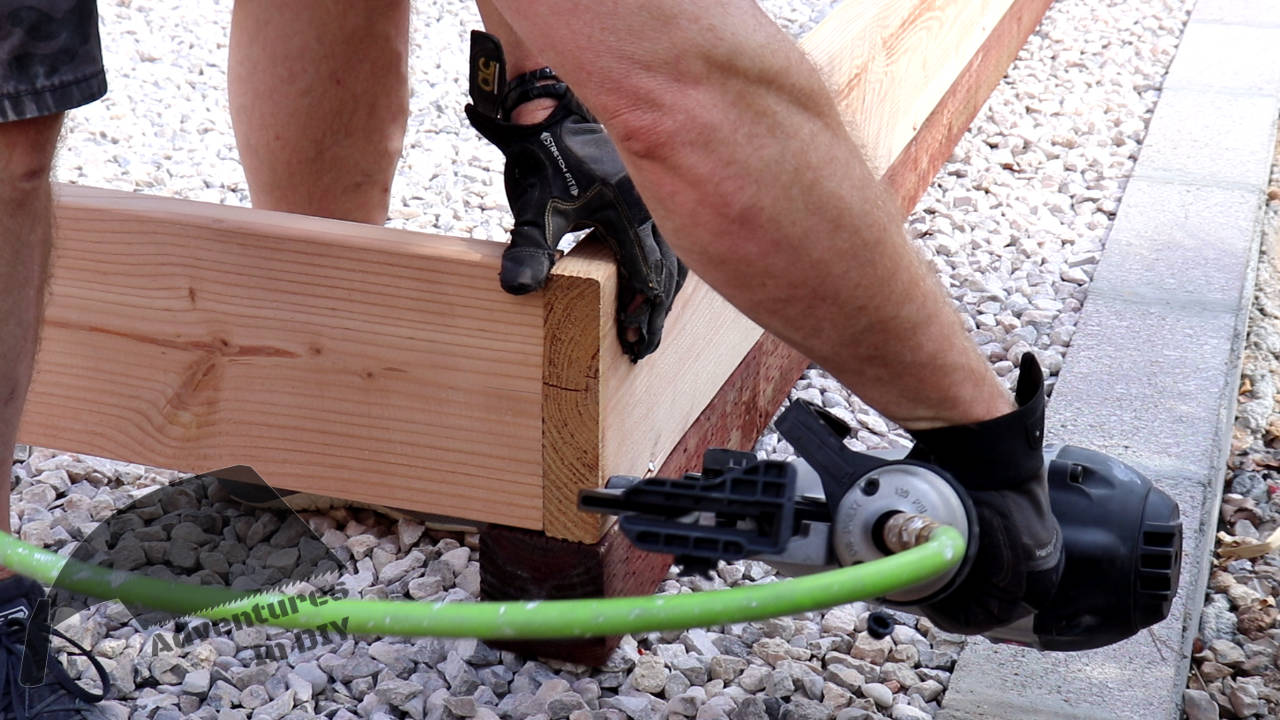
Attaching Rim Joists To 4×4 Skids
Don’t forget to crown the lumber! Crown side up.
You’re going to toe nail (nail in at an angle) the rim joists to the 4×4 pressure treated skids. Later we’ll use A23 brackets to better attach these to each other.

Attaching Rim Joists To Skids
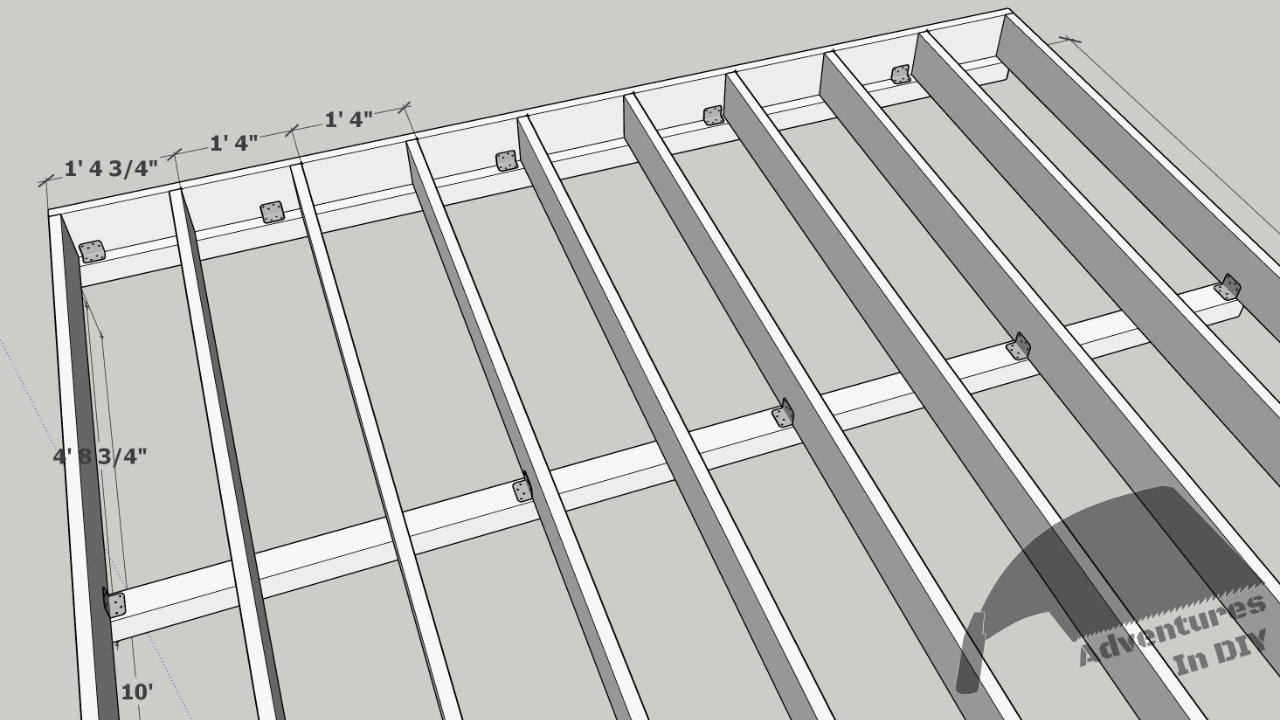
Cutting Floor Joists
All the 2 x 8 x 10 pieces of lumber need to be cut 9′ 9″
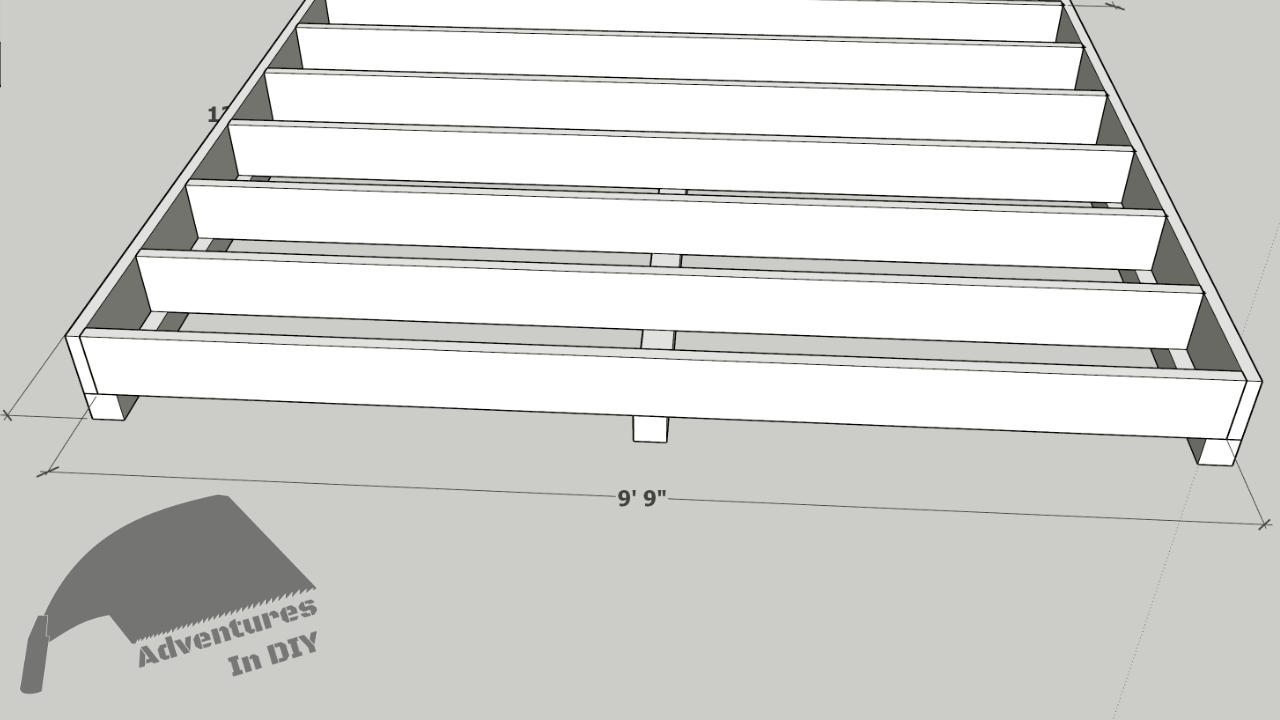
Floor Joist Measurements
Marking Outside Floor Joist For Center Skid
We’re going to mark the two outside floor joists at 4′ 8 ¾”. This will give us an alignment position for the center joist.

Mark The Outside Floor Joists For Center Skid Positioning
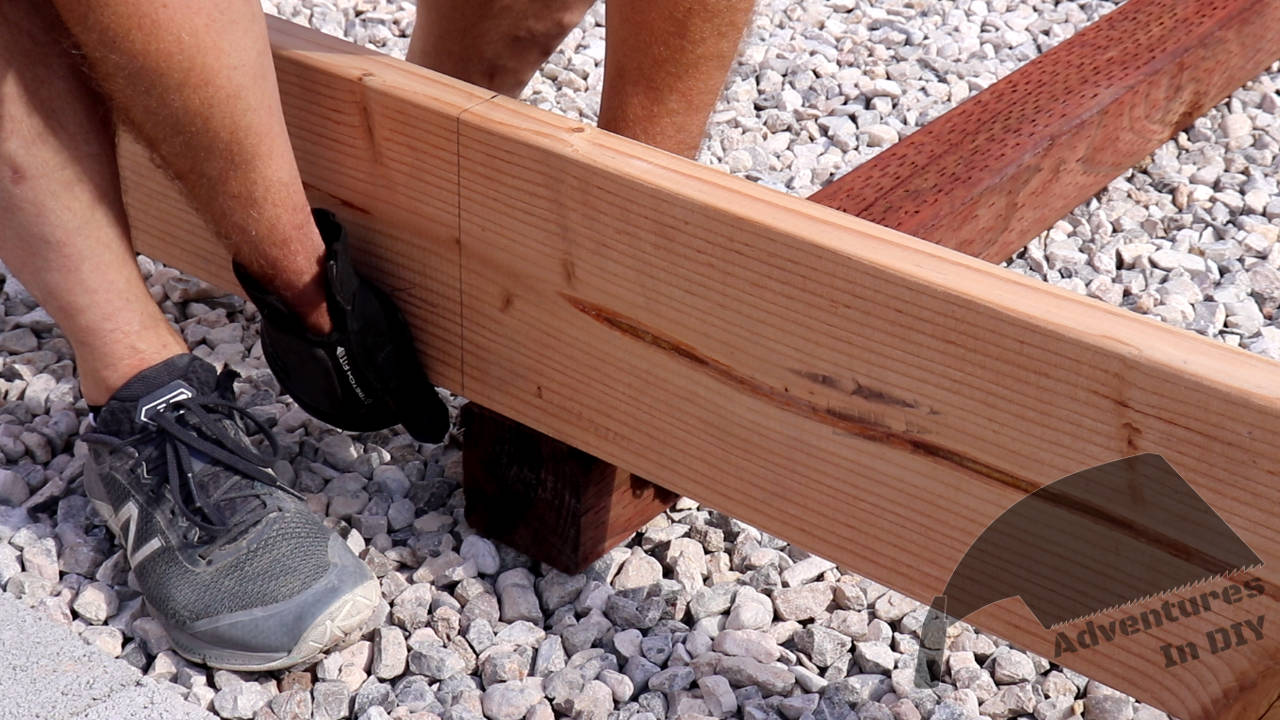
Installing Floor Joists
Remember when we did those layout marks on the rim joist? Now is when they come into play. You’re going to use those marks to line up the floor joists.

Floor Joist Layout
Don’t forget to crown the lumber! Last time I’m going to have to say it 🙂
Make sure you level the top of the joist with the rim joists! Don’t just set the joist on the skid and start nailing.

Leveling Joist With Rim Joist
Put 3 nails in each side of the outside joists. This will let us align the center skid.
Nailing Outside Joists To Rim Joists
Aligning Center Skid With Reference Mark
Now you’re gonna Groundhog Day it.
- Crown the joist
- Align joists
- Level the joist to the rim joist
- Put 3 nails in each side
- Repeat
Square Up The Floor Framing
You square up the floor framing by taking a diagonal measurement from two different corners.
Measuring Corner To Corner For Square
Close-Up Of Measuring Corner For Square
If you need to adjust one side just give it a little tap till your measurements are the same.
Install A23 Clips
Toe nailing the joists to the skids is probably enough, but if you want to go the extra mile use Simpson A23 clips. These will ensure you have multiple points that secure your joists to the skids.
You’ll use 5 clips per skid. In general, it’s good to keep them no more than 30 inches apart if possible.
A23 Clip Placement On Joists and Skids
The unfortunate thing is you’ll need to have two different screws to use with these clips. The joists are 1 ½ inches thick and the skids are 3 ½ inches thick. You could probably use a 1 ½ inch exterior and pressure treated rated screw for both but using at least a 2 inch screw on the skid will make sure it doesn’t go anywhere.
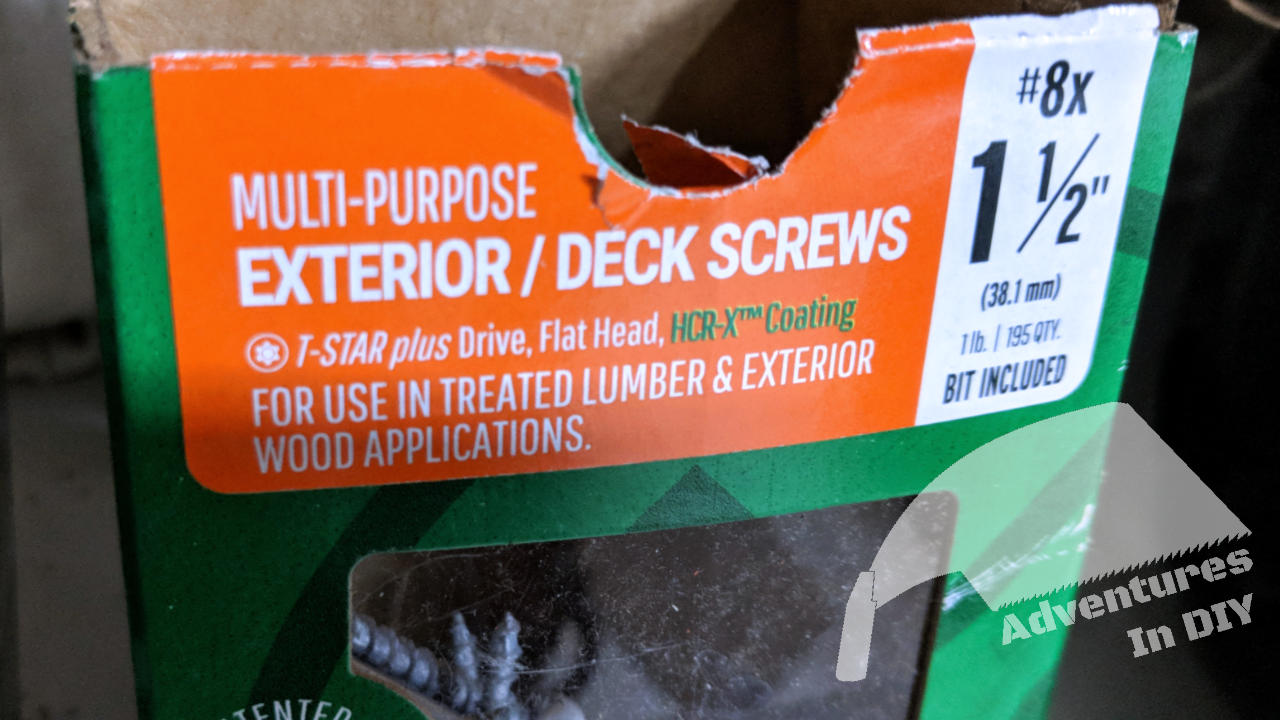
Screws Designed To Use With Pressure Treated Lumber

Installed Simpson A23 Clip
Materials List
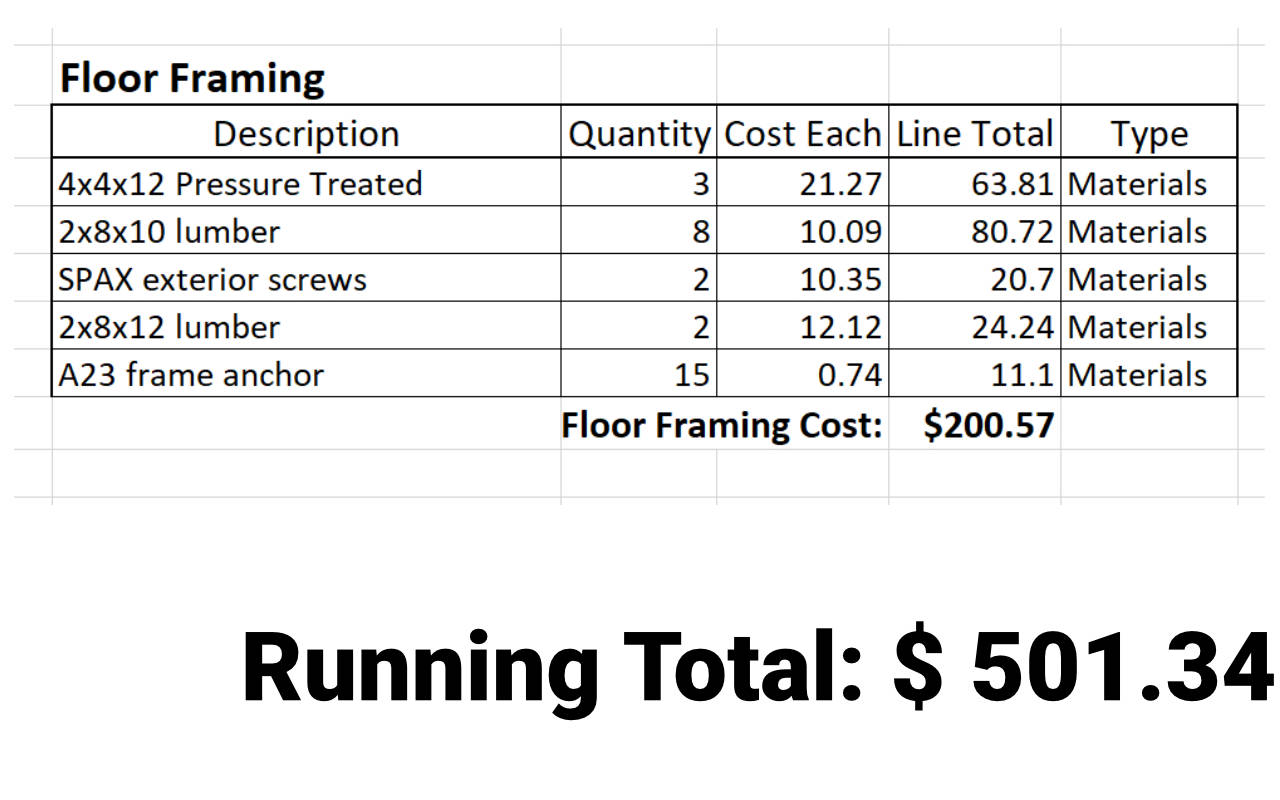
Floor Framing Cost
Hopefully this article helped you get started on building your shed foundation. If you found this interesting please think about signing up for our email list and get content sent straight to your email when it gets released. Also, we are on the social media sites above and YouTube.
Thank you very much for your support.
God bless you.
All the explanation is very clear and helpful.
I’m glad you found it helpful. Thank you for taking the time and visiting our site.
I noticed that the plans for this shed called for 2x8s for the joists, do you think there would be any issue switching to 2x6s for the joists?? It would impact the overall height of the shed but I’m fine with it.
hello, the first and the second joist are not 16 inch on center. They are 15 1/4 ” on center. Is this because of the plywood you lay on top afterwards so that it ends in the middle of a joist? Thank you very much for your detailed postings.
I do not see where you tell about the size and type of nails you used to attach the rim joists to the joists. We beginners do not know this kind of stuff. I have similar plans from a Black and Decker book on Sheds but they also leave out the size and quantity of nails. They tell you to buy so many boxes but not where they go for most boards.
I love you! I was searching for info on how to attach joists to skids, and GOD lead me here! Thank you for this AMAZING write-up!